Payload CMS – Website Development Workflow and Architecture
1. Introduction
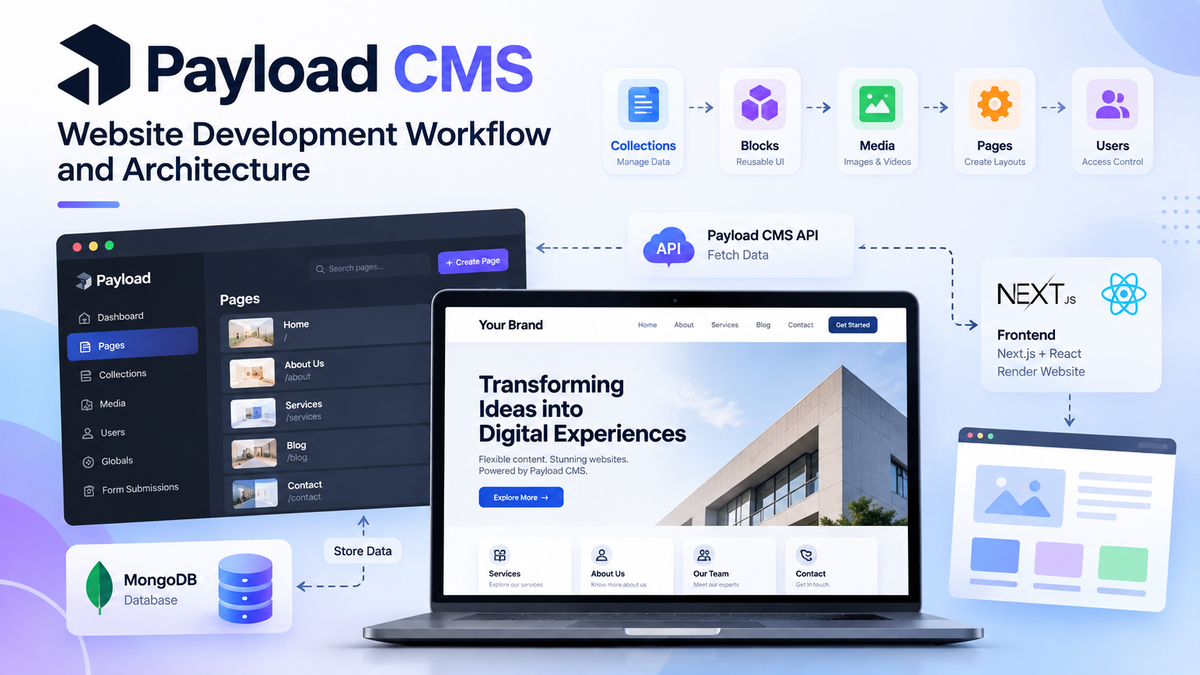
Payload CMS is used in our website project to manage backend data, configure pages, create reusable UI layouts, manage media assets, and control user access.
Our project uses Payload CMS with Next.js, React, TypeScript, and MongoDB. The admin panel provides an interface for managing website content, while the frontend displays that content through React components.
This document explains how to access the admin panel, configure pages, create collections and blocks, fetch data through APIs, manage assets, and understand the project file structure.
2. Technology Stack
- Payload CMS: Backend configuration and content management.
- Next.js: Website routing and page rendering.
- React: Frontend UI components.
- TypeScript: Type safety and development support.
- MongoDB: Database for storing structured data.
- Payload API: Fetching and managing backend data.
- Media Management: Managing website images, videos, icons, and other supported assets.
3. Project Folder Structure
The following is the structure of the Payload CMS Project-
PAYLOADACMS-PROJECT/
├── .next/
├── node_modules/
├── public/
└── src/
    ├── access/
    ├── app/
    │   ├── (frontend)/
    │   │   ├── page.tsx
    │   │   └── layout.tsx
    │   └── (payload)/
    ├── blocks/
    │   └── RenderBlocks.tsx
    ├── collections/
    │   └── Pages/
    │       └── index.ts
    ├── components/
    ├── Custom/
    │   ├── Blocks/
    │   │   ├── ClientBlocks/
    │   │   └── ServerBlocks/
    │   ├── Collections/
    │   │   └── AboutFirst/
    │   ├── endpoints/
    │   ├── fields/
    │   └── Footer/
    └── payload.config.ts
This is a partial representation of the visible folder structure.
Important directories
src/app/
Contains the Next.js application routes and related page or layout files.
src/blocks/
Contains block-related configuration or implementation files used by the project.
src/collections/
Contains collection configuration files or related collection modules, depending on the project organization.
src/components/
Contains reusable frontend components.
src/Custom/Blocks/ClientBlocks/
Organizes custom block implementations intended for client-side rendering or interaction, according to the project's conventions.
src/Custom/Blocks/ServerBlocks/
Organizes custom block implementations intended for server-side rendering or data processing, according to the project's conventions.
src/Custom/Collections/
Contains custom modules organized by website section, such as Blogs, Services, Events, Gallery, Treatments, and Our Team.
4. Accessing the Payload CMS Admin Panel
The Payload CMS admin panel is the main interface for managing website data.
How to log in
- Open the configured admin panel URL in your browser.
- Enter your registered email address and password.
- Click the Login button.
- After successful authentication, the admin dashboard will appear.
Use the credentials configured for your account. Access to collections and administrative features depends on the permissions assigned to your user.
What can we manage from the admin panel?
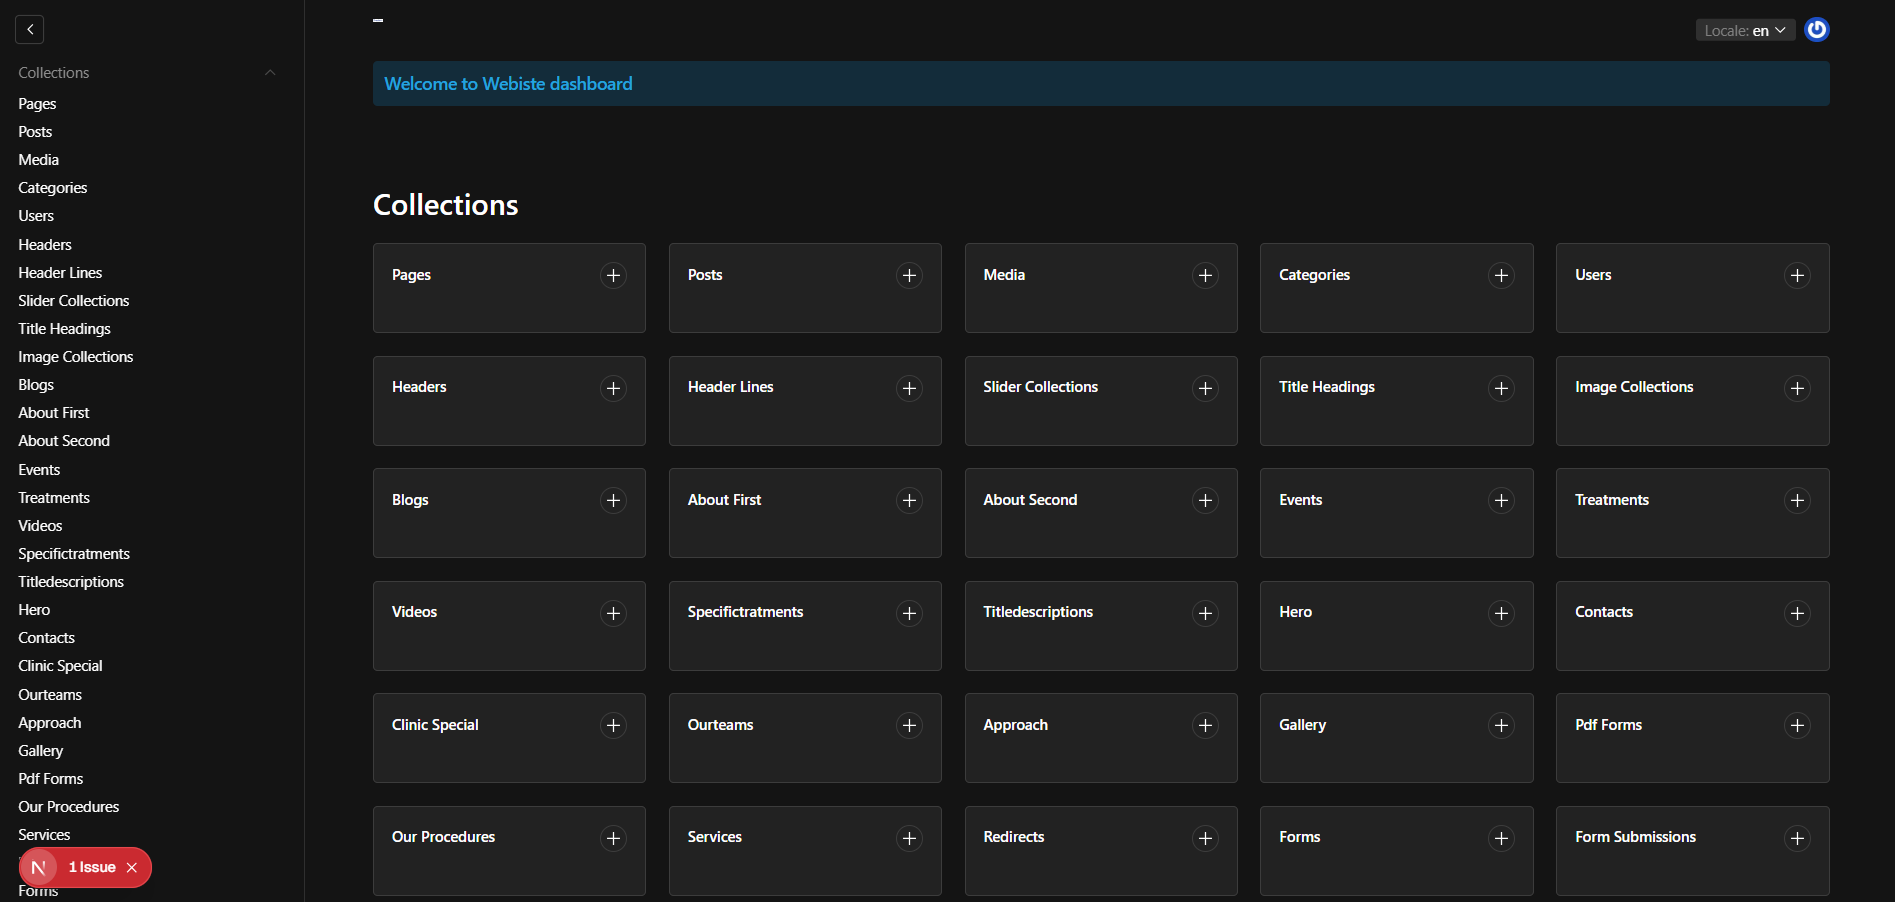
The available sections depend on the configuration of our project. They may include:
- Pages
- Collections
- Media
- Users
- Globals, such as Header and Footer
- Form submissions
- Other custom-configured sections
The admin panel acts as the interface for managing backend content without requiring developers to edit database records manually.
5. Pages – Creating and Configuring Website Pages
The Pages section allows us to create and manage different pages of the website.
For example, we can create pages such as:
- Home
- About Us
- Services
- Treatments
- Our Team
- Contact Us
The available page types and fields depend on the Pages collection configuration.
How to configure a page
- Open the Pages section in the admin panel.
- Click Create New or the equivalent option.
- Enter the required page information, such as the title and slug.
- Configure the page layout by adding the available blocks.
- Arrange the blocks in the order required for the page.
- Enter the content and select the required images or other assets.
- Save the page and publish it if publishing is supported by the configuration.
- Open the corresponding frontend URL to verify the result.
Understanding page layouts
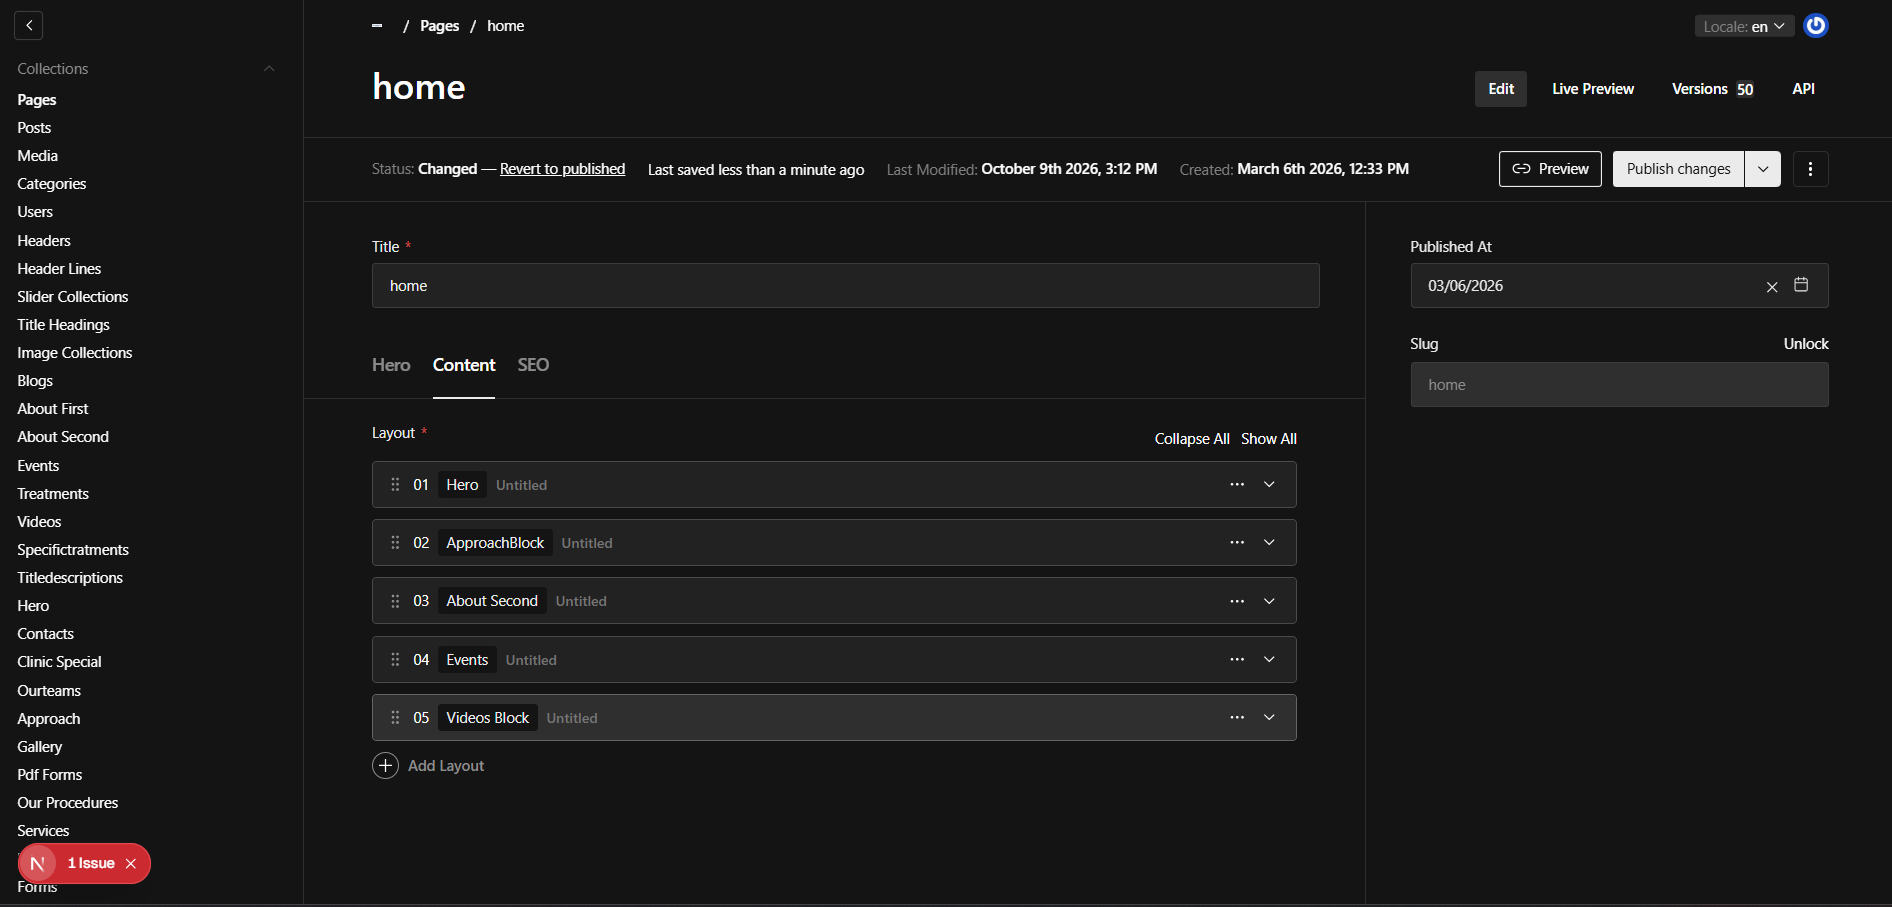
A page layout determines which UI components appear on a particular webpage and in what order.
For example, the Home page might contain:
- Hero section
- About section
- Services section
- Testimonials section
- Contact section
Another page can use a completely different combination of components.
This allows us to configure multiple website pages using reusable components instead of building every page layout from scratch.
6. Collections – Managing Backend Data
Collections define the structure of the data managed by Payload CMS.
They allow us to specify which fields should be available when creating or editing a record through the admin panel.
Examples of collections in our project
Our project contains custom collection-related folders for sections such as:
- Blogs
- Services
- Events
- Gallery
- Our Team
- Treatments
- Videos
- Contact
These names are visible in our project structure. Their exact behavior in the admin panel depends on how the collection configurations are registered.
How to create a collection
- Create a collection configuration file in the appropriate project directory.
- Define the collection slug.
- Add the required fields.
- Configure validation and access permissions where needed.
- Register the collection in
payload.config.ts. - Start or restart the application if necessary.
- Open the admin panel and verify that the collection is available.
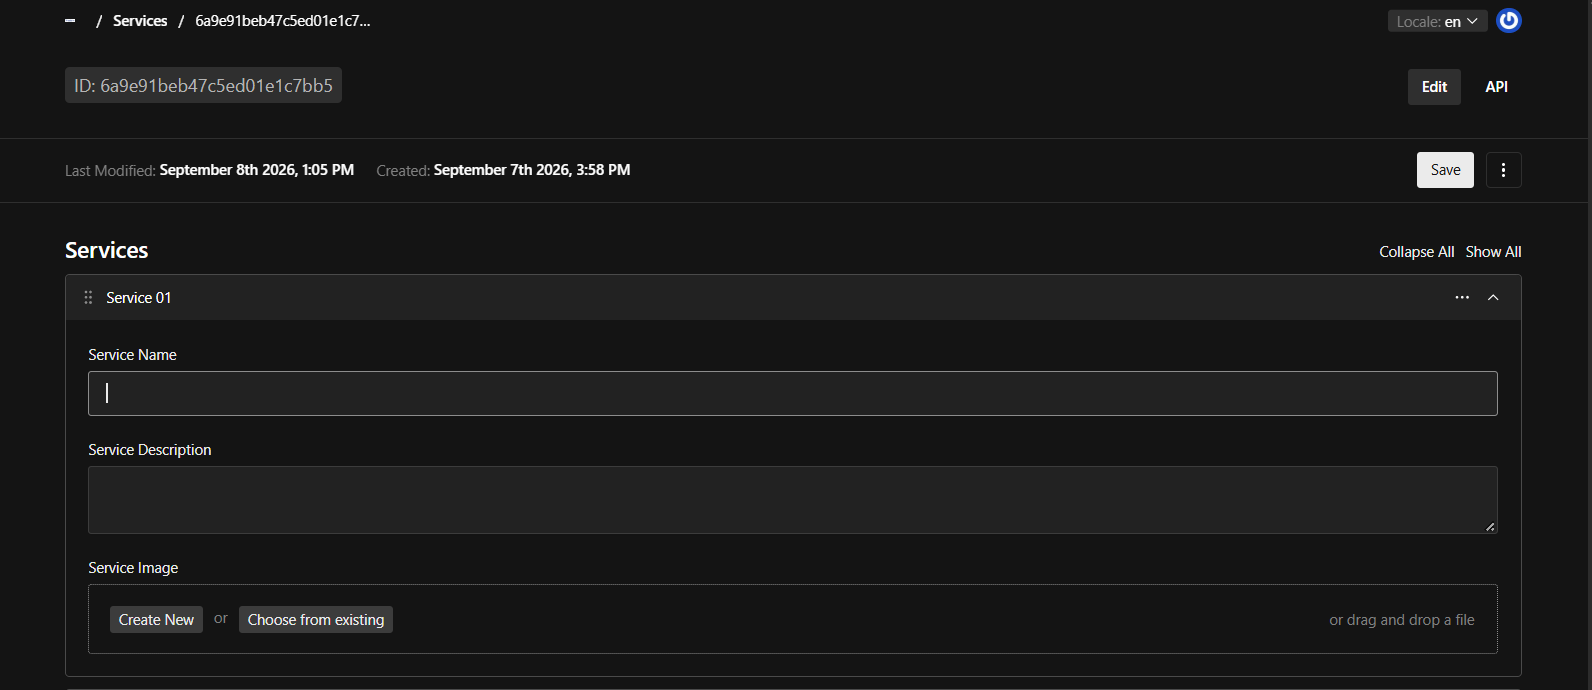
Example: Creating fields for a collection
Suppose we want to create a Services collection.
The fields might include:
Field | Type | Purpose |
|---|---|---|
Title | Text | Name of the service |
Slug | Text | URL-friendly identifier |
Label | Text | Short display label |
Description | Textarea or Rich Text | Detailed service information |
Image | Upload or Relationship | Image associated with the service |
Status | Select or Checkbox | Publication or availability state, depending on the schema |
For example, a service record could contain the title Digital Marketing, the slug digital-marketing and a description explaining the service.
When a record is created in the admin panel, Payload validates and processes the data according to the collection configuration and stores it through the configured database adapter.
Where can we see the data?
- In the Payload admin panel, open the corresponding collection to view and edit records.
- In MongoDB Compass, inspect the database records when database access is available.
- On the frontend, view the data wherever the application fetches and renders that collection.
7. Blocks – Creating Reusable UI Layouts
Blocks define reusable content sections that can be added to pages.
In our project, blocks allow us to separate the page layout configuration from the React components that render the actual UI.
Examples include:
- Hero
- Header Line
- Title Heading
- Title Description
- Image
- About
These names are visible in our custom project folders and may represent different block configurations or implementations.
How to create a block
Step 1: Create the block configuration
Define the block's slug and fields. These fields determine what content can be entered in the admin panel.
For example, a Hero block might contain a heading, description, image, and button label.
Step 2: Create the React component
Create a React component that receives the block data and displays it on the frontend.
Step 3: Register the block
Register the block in the relevant collection's layout field or another supported blocks field.
Step 4: Add the block to a page
Open the Pages section in the admin panel, select the required page, and add the newly available block to its layout.
Step 5: Save and verify
Save the page and check the frontend to confirm that the component renders correctly.
How do blocks work?
The general flow is:
Block Configuration → Admin Panel Fields → Saved Page Data → RenderBlocks Component → React UI Component → Website
Blocks make it possible to reuse the same UI section across multiple pages while allowing each page to display different content.
8. Fetching API Data Inside Blocks
Blocks can display data entered directly through the admin panel or data retrieved from an API.
When a block needs dynamic data, its React component or the appropriate server-side data-fetching layer can request information from Payload or another configured API.
Example workflow
- Define the required fields in the block configuration.
- Create the frontend component for the block.
- Identify the data source.
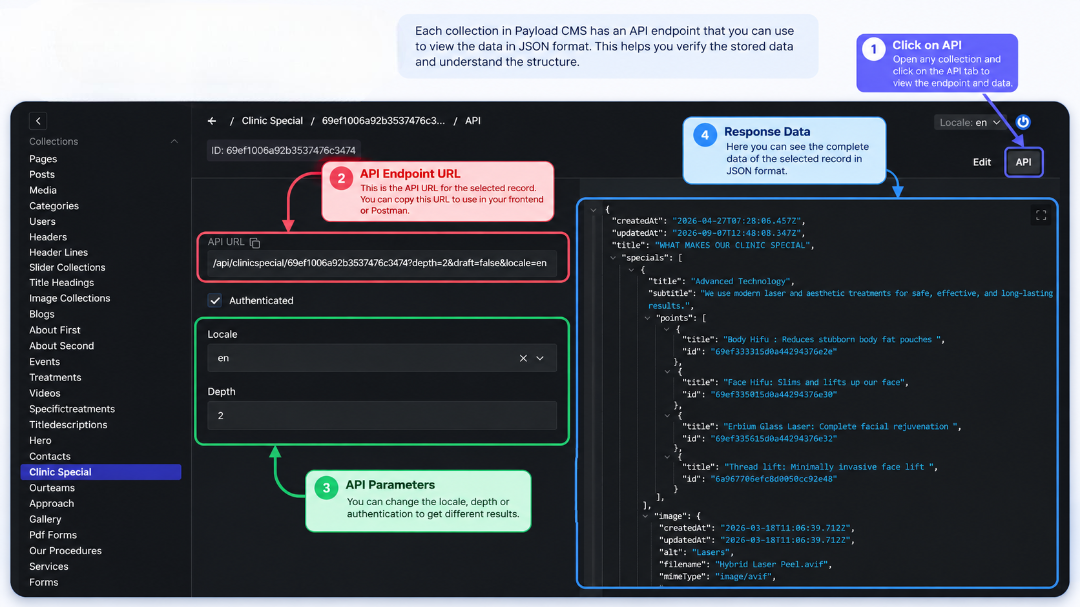
- Fetch the required data through the Payload Local API, REST API, or another API.
- Process the response and pass the data to the component.
- Render the result on the webpage.
- Handle loading states, empty results, and errors where appropriate.
Payload Local API
The Local API is useful when the Next.js server needs to retrieve Payload data directly within the application.
Payload REST API
The REST API is useful when data needs to be retrieved through HTTP requests, including by a separate frontend or another application.
The API method should be chosen according to the project's architecture and access requirements.
Important: API requests should be made in the appropriate server or client context. Private API credentials must not be exposed in browser-side code.
Dynamic Data Management
One of the main advantages of this approach is that website content can be updated directly through the Payload CMS admin panel without modifying the frontend code for every content change.
For example, if we need to change a service title, description, image, or other content, we can update the corresponding data in the admin panel. The frontend retrieves and displays the updated values through the existing API integration and UI components.
This means routine content changes generally do not require code modifications or a new deployment. However, changes to the data structure, component design, API logic, or functionality may still require development work.
9. Media – Managing Images, Videos, and Icons
The Media section is used to manage uploaded files through the configured media collection.
Depending on the project's upload configuration, supported assets may include:
- Website images
- Hero banners
- Blog or service images
- Videos
- Icons and illustrations
- Logos and other design assets
How to upload an asset
- Open the Media section in the admin panel.
- Click the option to create or upload a media record.
- Select the required file.
- Enter any required metadata, such as alternative text.
- Save the record.
- Select or reference the asset from the relevant page, block, or collection.
Where are uploaded files stored?
The actual file location depends on the configured storage provider. Files may be stored locally, on the application server, or in a cloud storage service.
MongoDB generally stores the media document and its metadata, while the actual file is stored according to the upload configuration.
Best practices
- Use meaningful filenames.
- Optimize images before uploading them.
- Add alternative text for accessibility.
- Use appropriate image dimensions for the intended layout.
- Verify that the file URL is accessible on the deployed website.
10. Users and Access Permissions
The Users section manages the accounts that can access the Payload admin panel.
Depending on the configured authentication and access-control rules, different users may have different permissions.
For example:
- Administrator: manages configuration and content.
- Content editor: creates and updates website content.
- Restricted user: accesses only the resources permitted by the project.
How to create a user
- Open the Users collection in the admin panel.
- Create a new user.
- Enter the required account information.
- Assign the appropriate permissions if role-based access control is configured.
- Save the user.
- Verify that the user can access only the intended sections.
User roles and permissions must be implemented in the project's access-control configuration; creating a user alone does not automatically provide a particular role.
11. Global Header and Footer
Global configurations are suitable for website-wide content that is managed as a single shared record.
In our project, Header and Footer functionality is used to manage common website elements.
Header configuration
The Header may contain:
- Company logo
- Navigation items
- Dropdown menus
- Links to important pages
- Call-to-action buttons
The navigation items can be configured through the relevant Header configuration and displayed through the frontend Header component.
Footer configuration
The Footer may contain:
- Company details
- Useful links
- Contact information
- Social media links
- Copyright information
How the data is displayed
- Configure the Header or Footer fields.
- Register the relevant global in Payload, if it is implemented as a global.
- Enter or update the content in the admin panel.
- Fetch the global data through the appropriate Payload API.
- Pass the data to the Header or Footer React component.
- Render the component in the shared Next.js layout.
If the project implements these sections as collections rather than Payload Globals, the corresponding workflow will differ.
12. Forms and Form Submissions
Forms allow website visitors to submit information through the frontend.
Depending on the project configuration, a form may collect information such as a name, email address, phone number, or message.
General workflow
- Create or configure the form fields.
- Build the frontend form component.
- Validate the submitted data.
- Send the data to the configured backend endpoint.
- Validate and process the submission on the server.
- Store the submission if persistence is configured.
- View the submitted records in the relevant admin section.
If the project has a form-submissions collection or a configured form plugin, authorized users may be able to view the submissions in the admin panel.
The exact storage and processing behavior depends on the implementation.
[Screenshot 14: Insert a screenshot of the form submissions section.]
Recommended image: Show the list of submitted records using dummy or anonymized data.
13. TypeScript Type Generation
Payload can generate TypeScript types based on the configured collections, globals, and fields.
Command
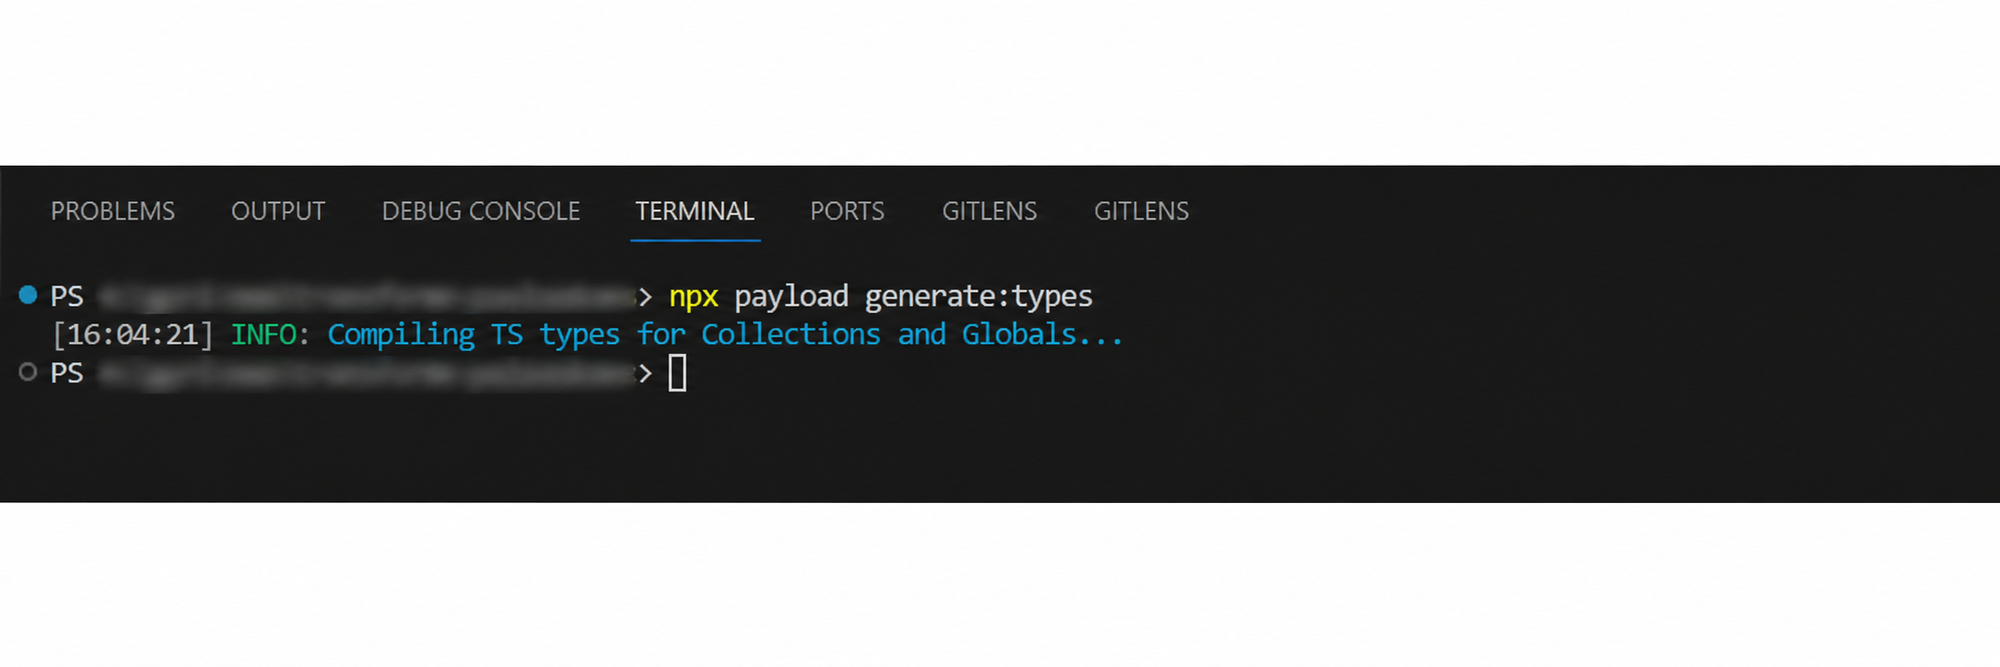
Run the following command in the project terminal:
npx payload generate:types
Why is type generation required?
- Keeps TypeScript definitions aligned with the CMS schema.
- Improves autocomplete and developer experience.
- Helps identify incorrect field names and data types.
- Makes it easier to work with collection, global, and block data.
When should we run the command?
Run the command after adding or modifying collection fields, globals, or block configurations that affect the generated types.
The output is commonly stored inpayload-types.ts, depending on the configuration.
14. Complete Data Flow
The overall workflow can be summarized as follows:
- The developer configures Payload CMS and the database connection.
- Collections and globals define the structure of the backend data.
- Block configurations define the content fields available to page editors.
- Users manage content through the admin panel.
- Payload stores structured data in MongoDB and files in the configured media storage.
- The frontend fetches the required data through the Payload Local API, REST API, or another configured endpoint.
- The relevant Next.js page receives the data.
RenderBlocks.tsxIt identifies each block type and renders its corresponding component.- React components display the content.
- The final webpage is rendered for the website visitor.
15. Conclusion
Payload CMS provides the content management and backend functionality for our website. Collections define the structure of records, blocks define reusable page sections, and globals manage shared website content.
The frontend retrieves the required data and renders it through Next.js pages and React components. This enables dynamic content management, allowing authorized users to update website content, images, navigation items, and page layouts directly through the Payload CMS admin panel without modifying the frontend code for every content change.
Understanding the admin panel, project folder structure, collections, blocks, API integration, media management, and rendering flow helps developers maintain the website and implement new features efficiently.