Inventory Management

Inventory Management is the entire process of managing inventories from raw materials to finished products, like ordering, storing, using, and selling a stock. Inventory management tries to efficiently streamline product inventories to avoid shortages or oversupply.
Mobile App
In the app, the user can login and check the inventory for that particular warehouse.
Login
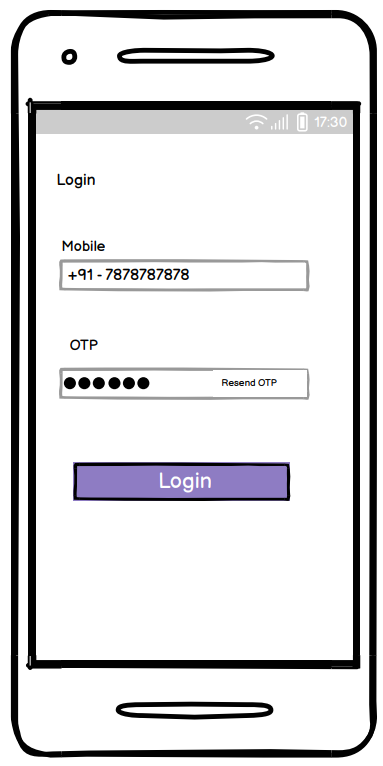
You must provide your user ID to log in to the mobile app. Once you add the User ID and then type a password, click on the login button in the app.
To add a new entry of any product or out entry of any product, the user needs to login first with the mobile app or website, and then after login, the user can fill in or out entry form.
Select warehouse
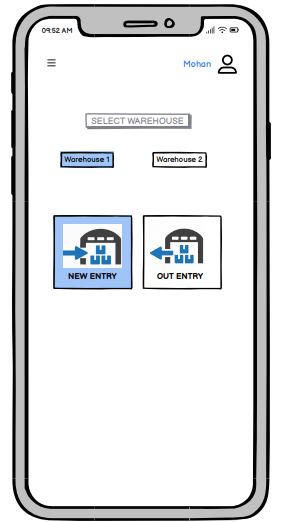
The user should select the warehouse before filling out the form of in or out entry. After selecting Warehouse 1 or Warehouse 2, the user needs to choose the entry button whether the product is going to be added to the warehouse (new entry) or the product is going out of the warehouse (out entrance)
New Entry Form
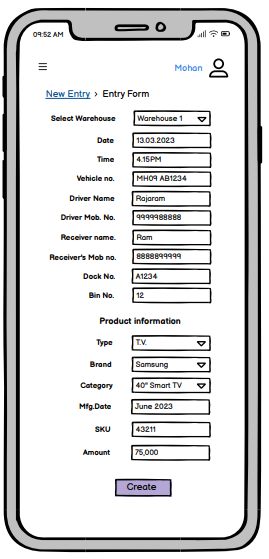
You will see the form above once you select the tab new entry. You can add all the details in the state and create an entry for the product.
Out Entry Form
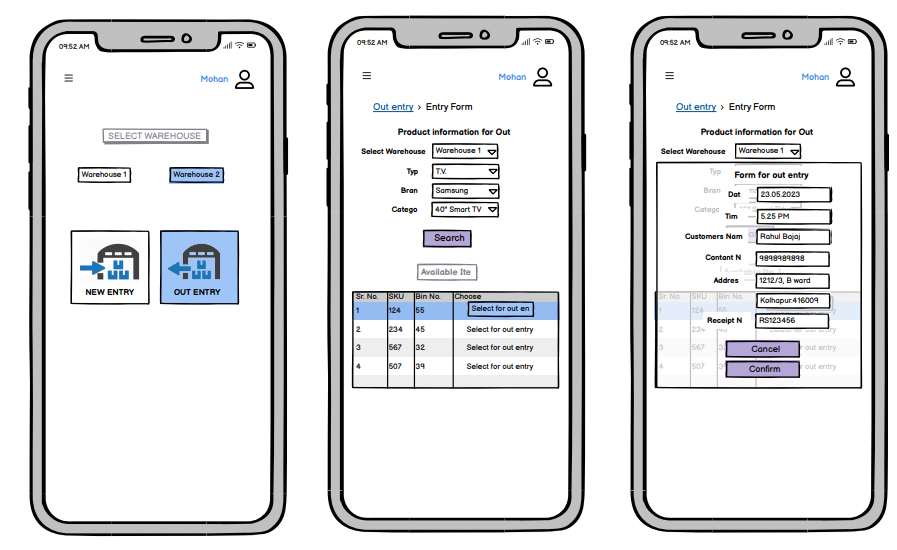
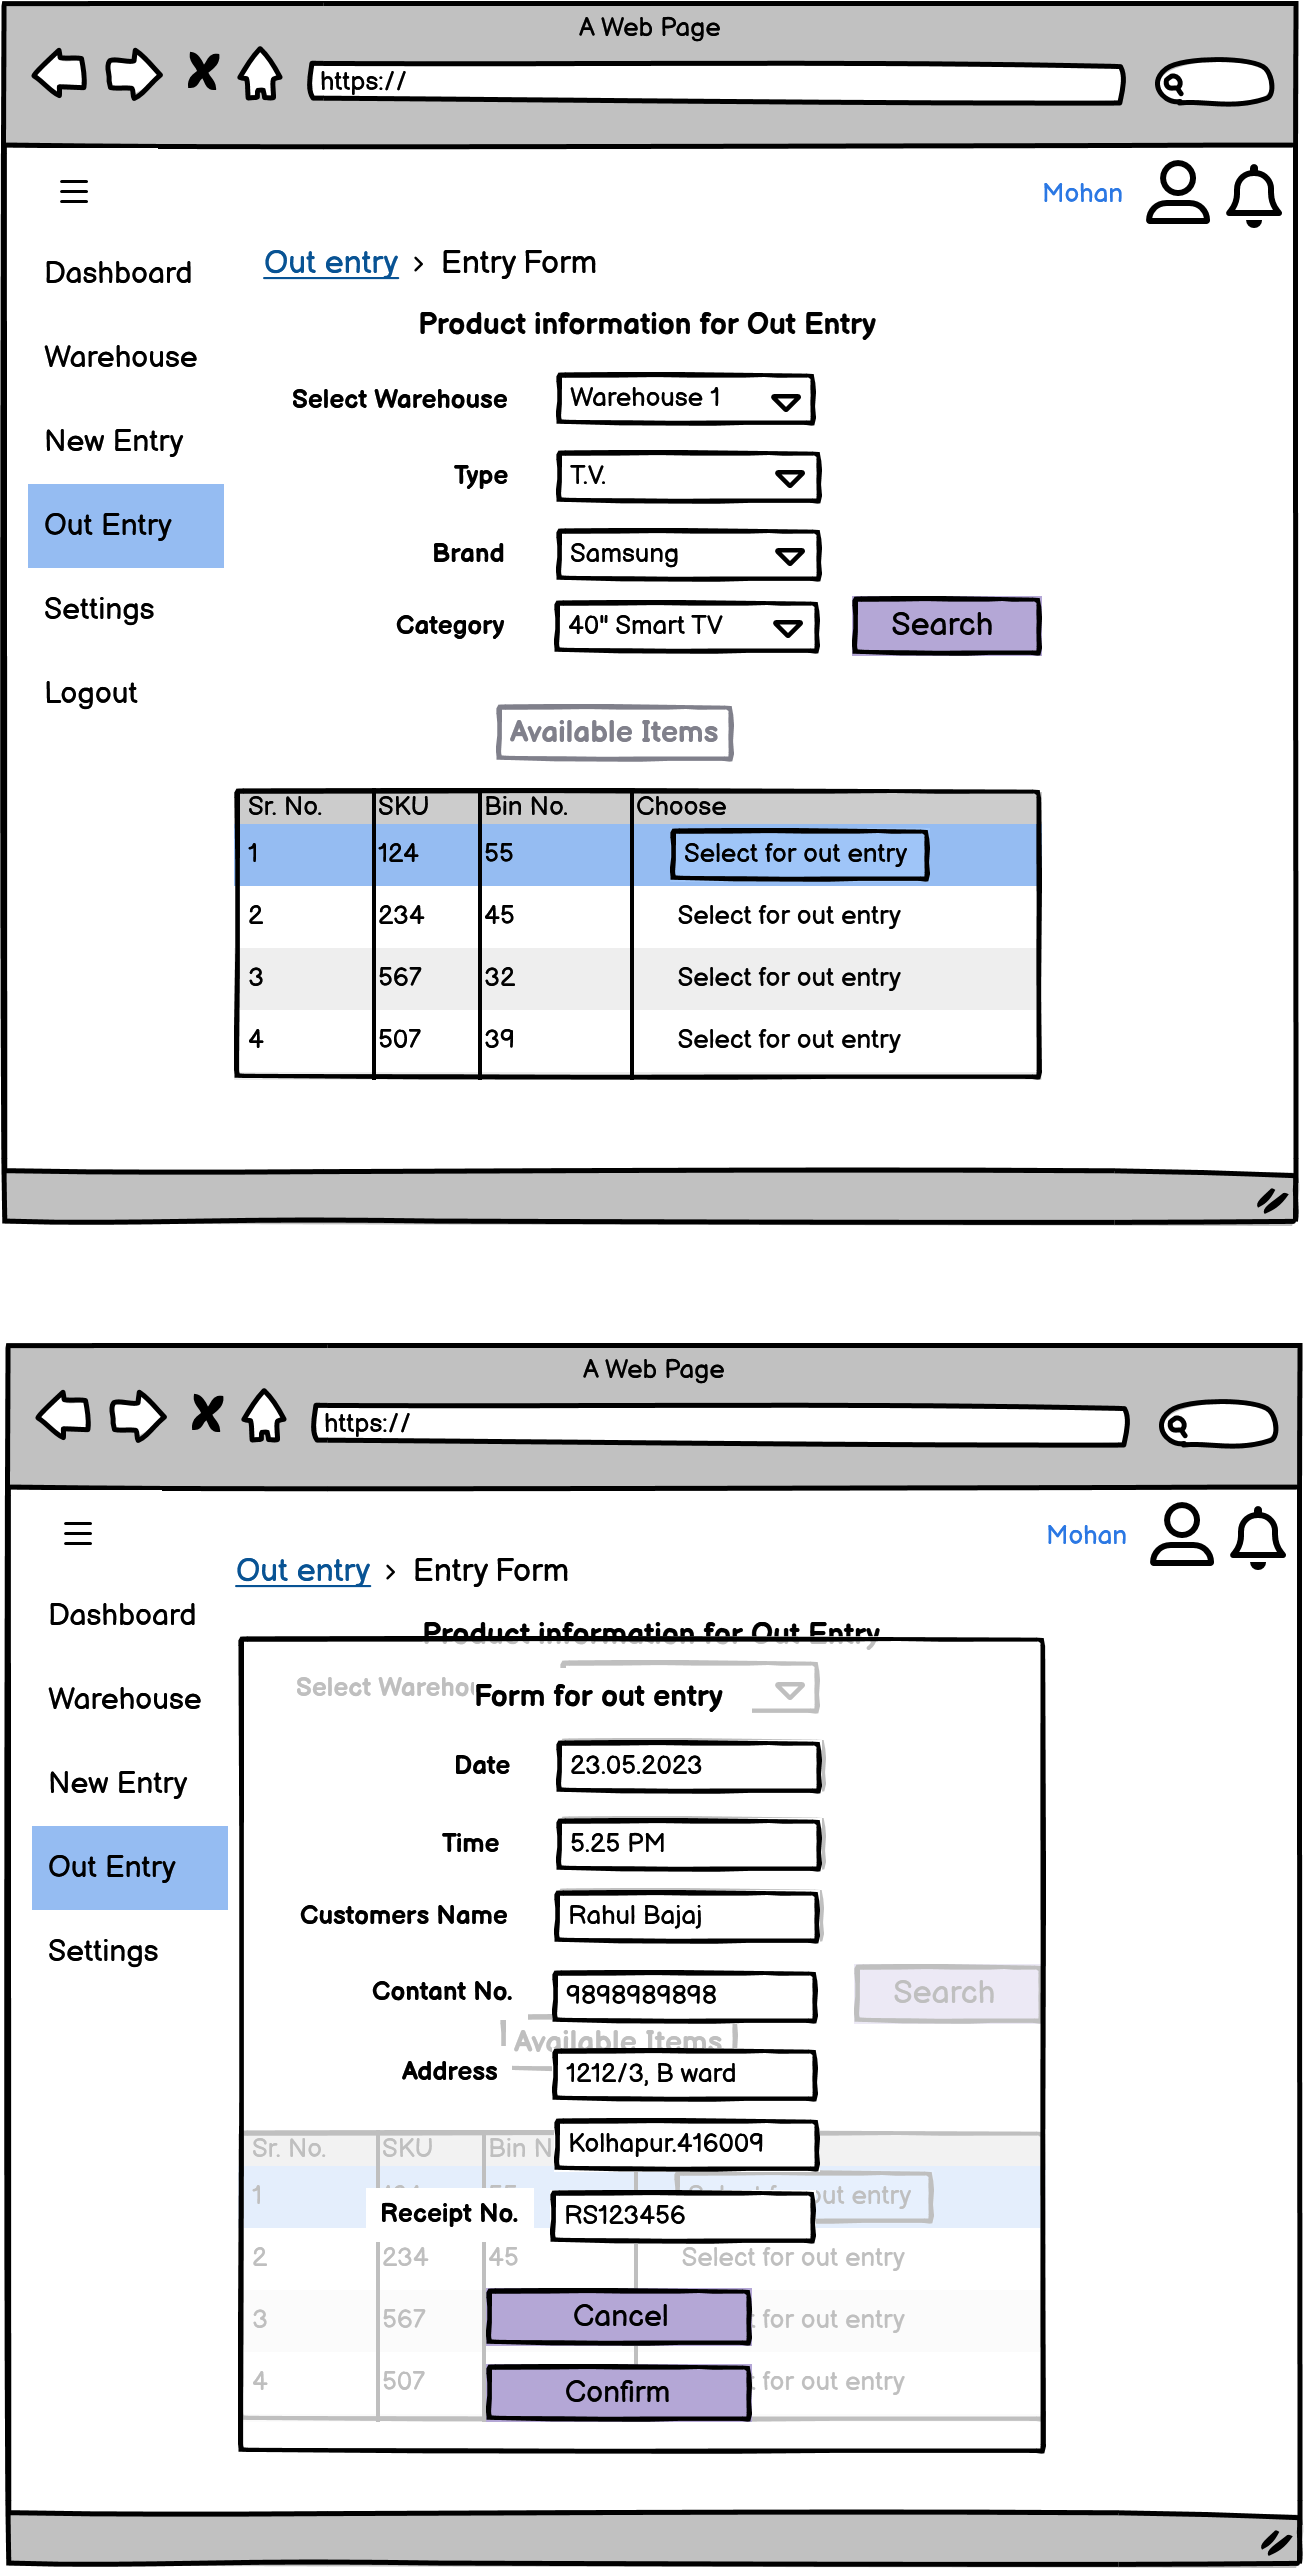
To create an out-entry form, you have to first choose the warehouse and then click on the out-entry button. Fill out all the information asked in the form. After checking all the information, click on the confirm button, and you will save the out entry.
Desktop Version
For the desktop, the user can login and check all the inventory from both warehouses.
Login
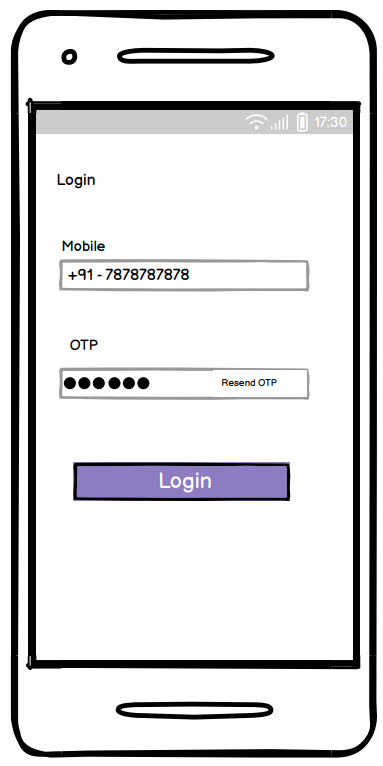
To login with the web version of inventory management as you login on to the mobile app similarly, you have to use a user ID and password.
Dashboard (All items)
To check the inventory from warehouses, go to the dashboard, select where you want to check the inventory, whether from warehouse 1, warehouse 2, or all warehouses, and click on it. After that, you will see all the items in the warehouse and the number of quantities per item.
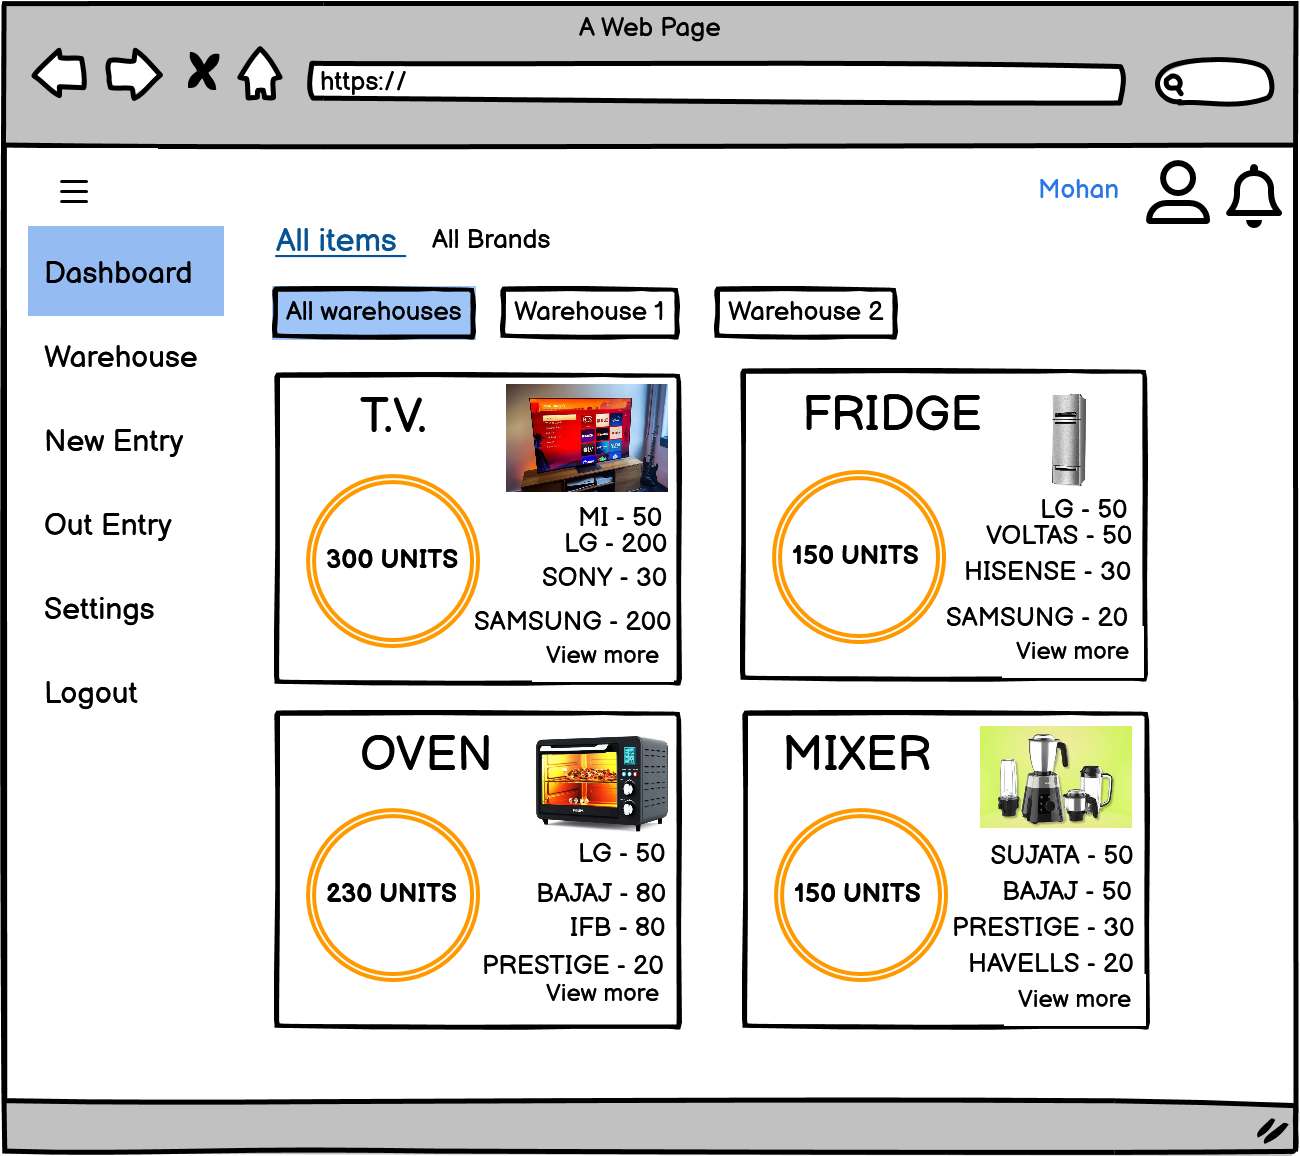
Here, in the image above, we can see that the user has selected all warehouses, and clicking that button shows all available items in the warehouses with their available count.
Warehouse 1
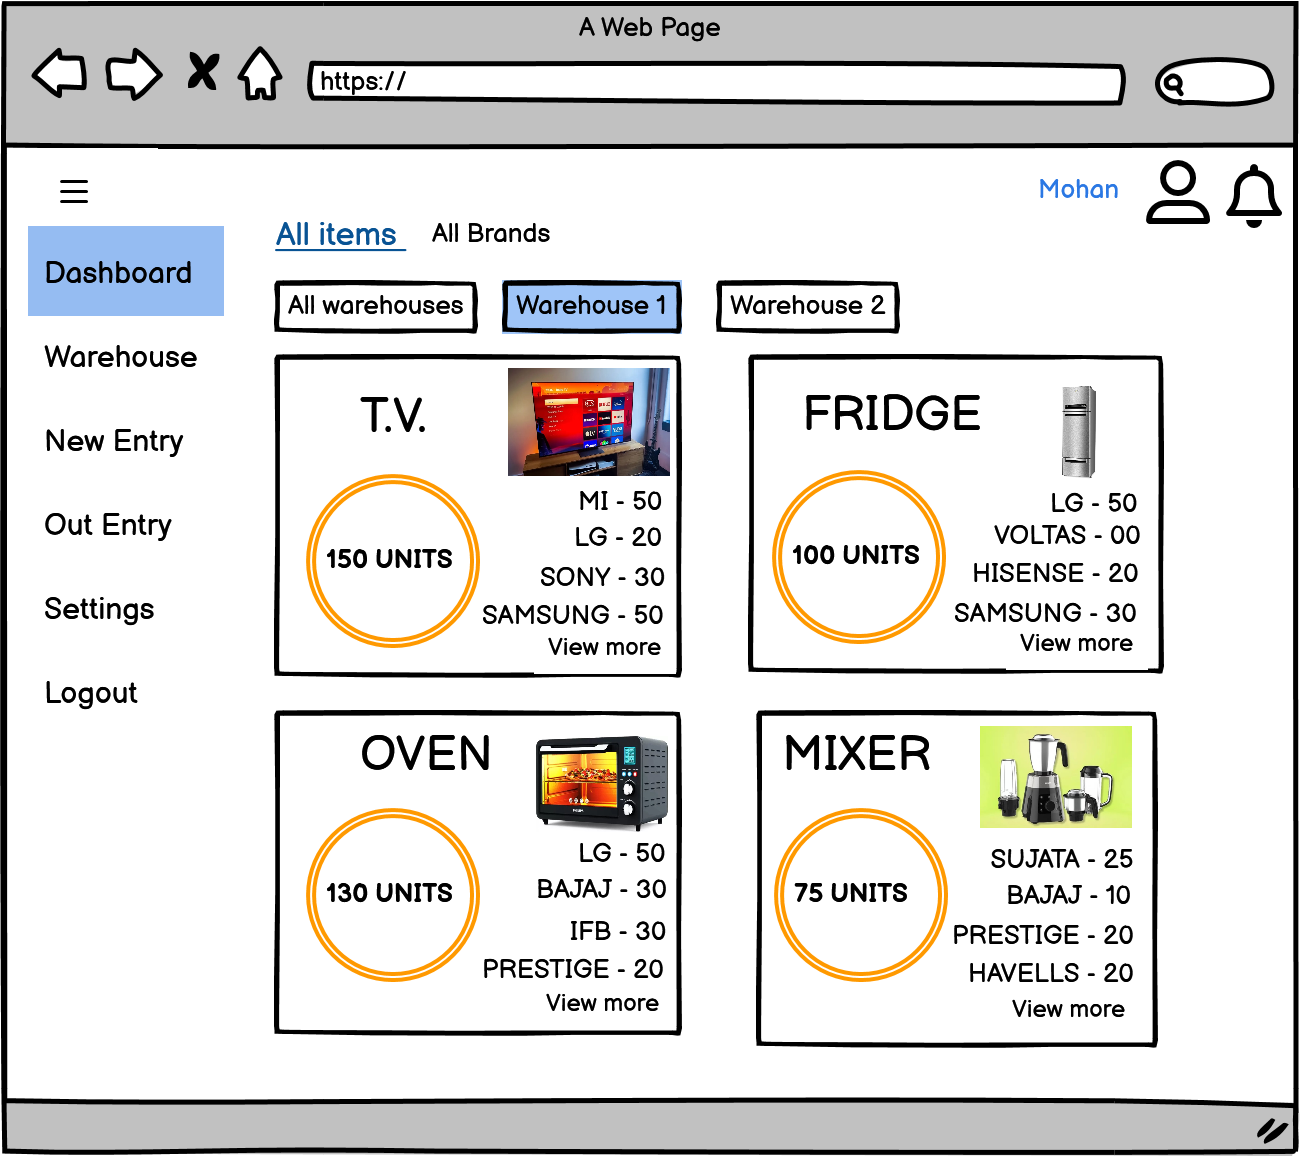
If you click the warehouse 1 button you will see the list of items in warehouse 1 with its available count.
Similarly if you choose the warehouse 2 you will get all the information about the products.
Dashboard (All items-TV)
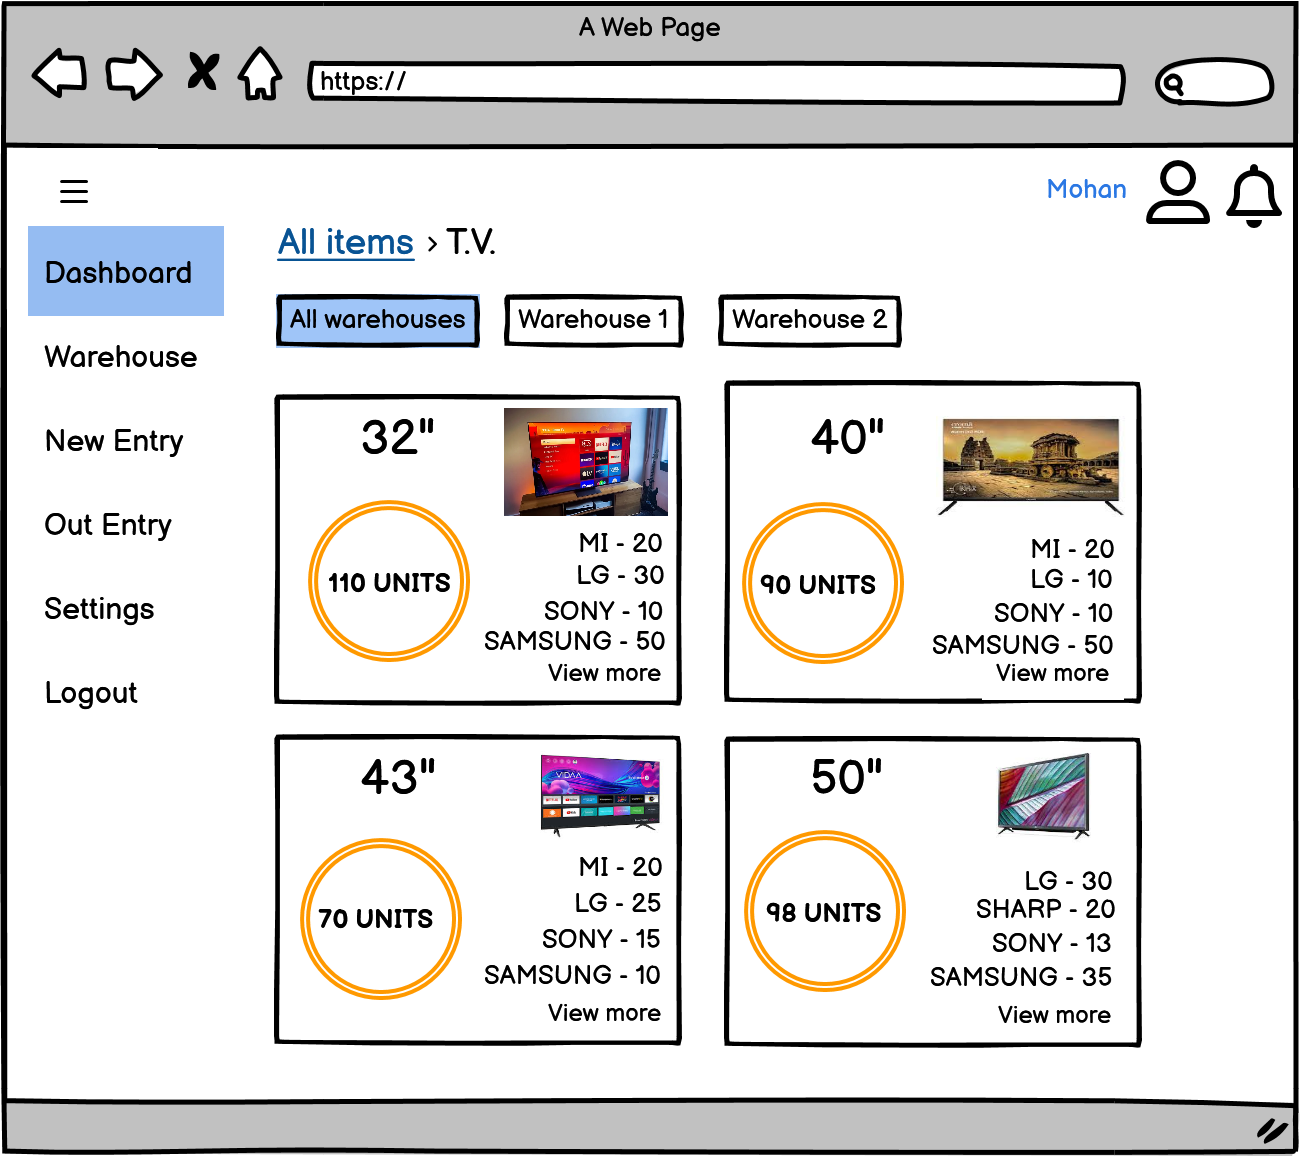
In the image above, we selected TV from all items under the Dashboard.
To check the quantity of specific items like TV or Fridge. We have to choose the specific item first, and then we can check the details of that item in quantities, types, and sizes under the dashboard.
Dashboard (All Brands)
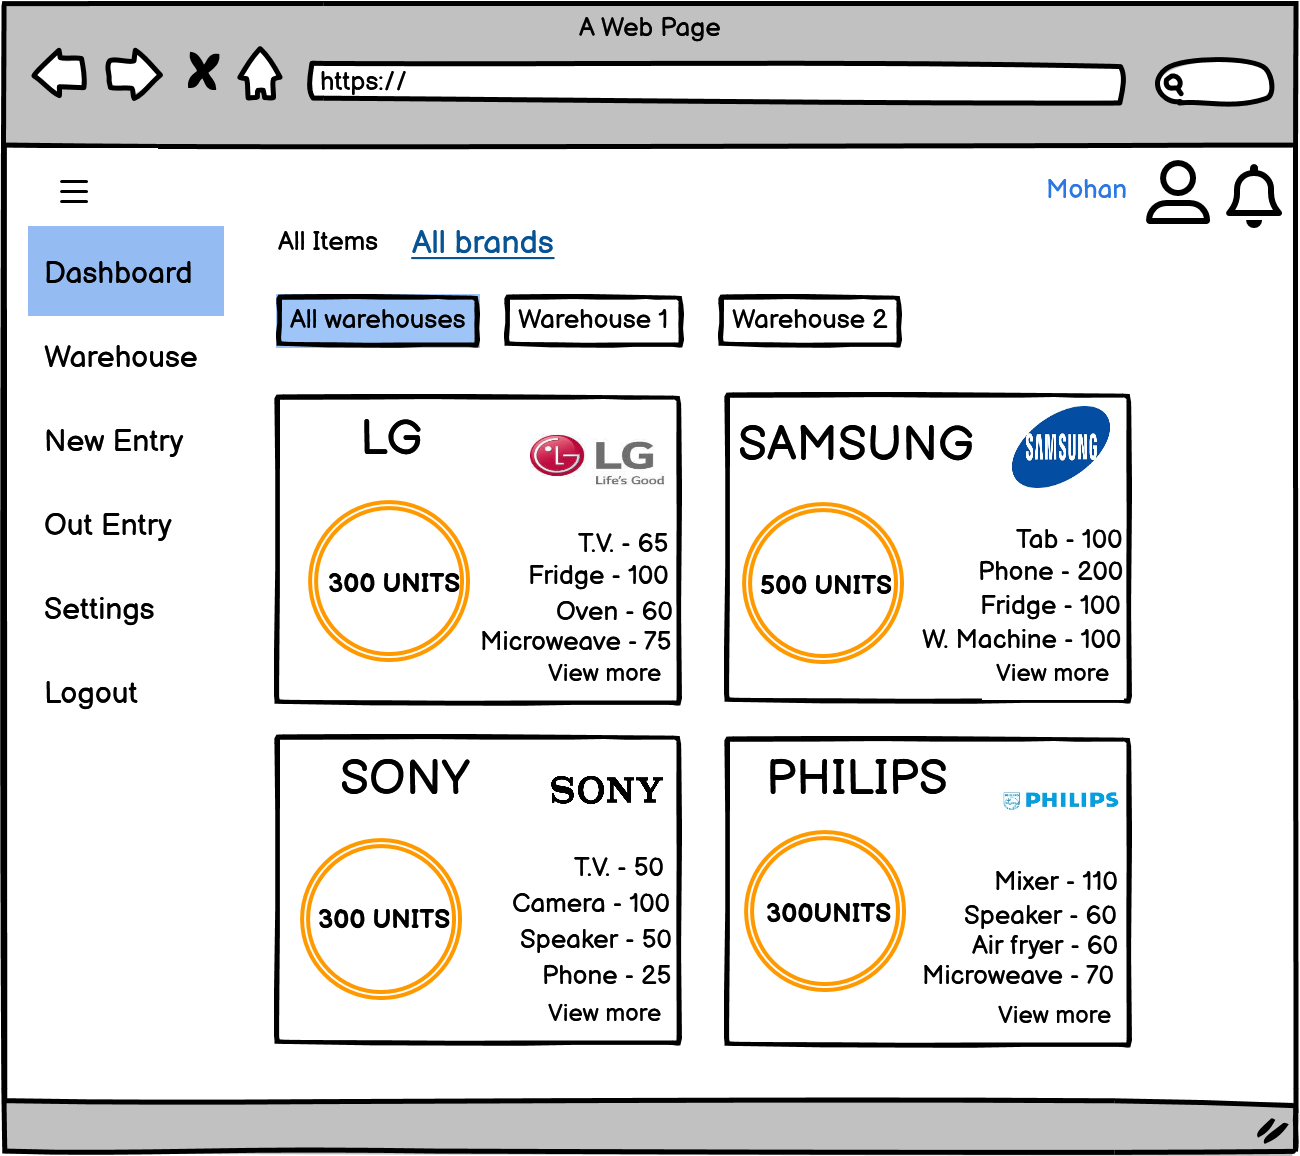
To check all available brands and their different items in the warehouse, we have to choose all brands under the dashboard.
You can select warehouse 1, warehouse 2, or all warehouses. According to selection it will show the count.
Dashboard (TV-All sizes)
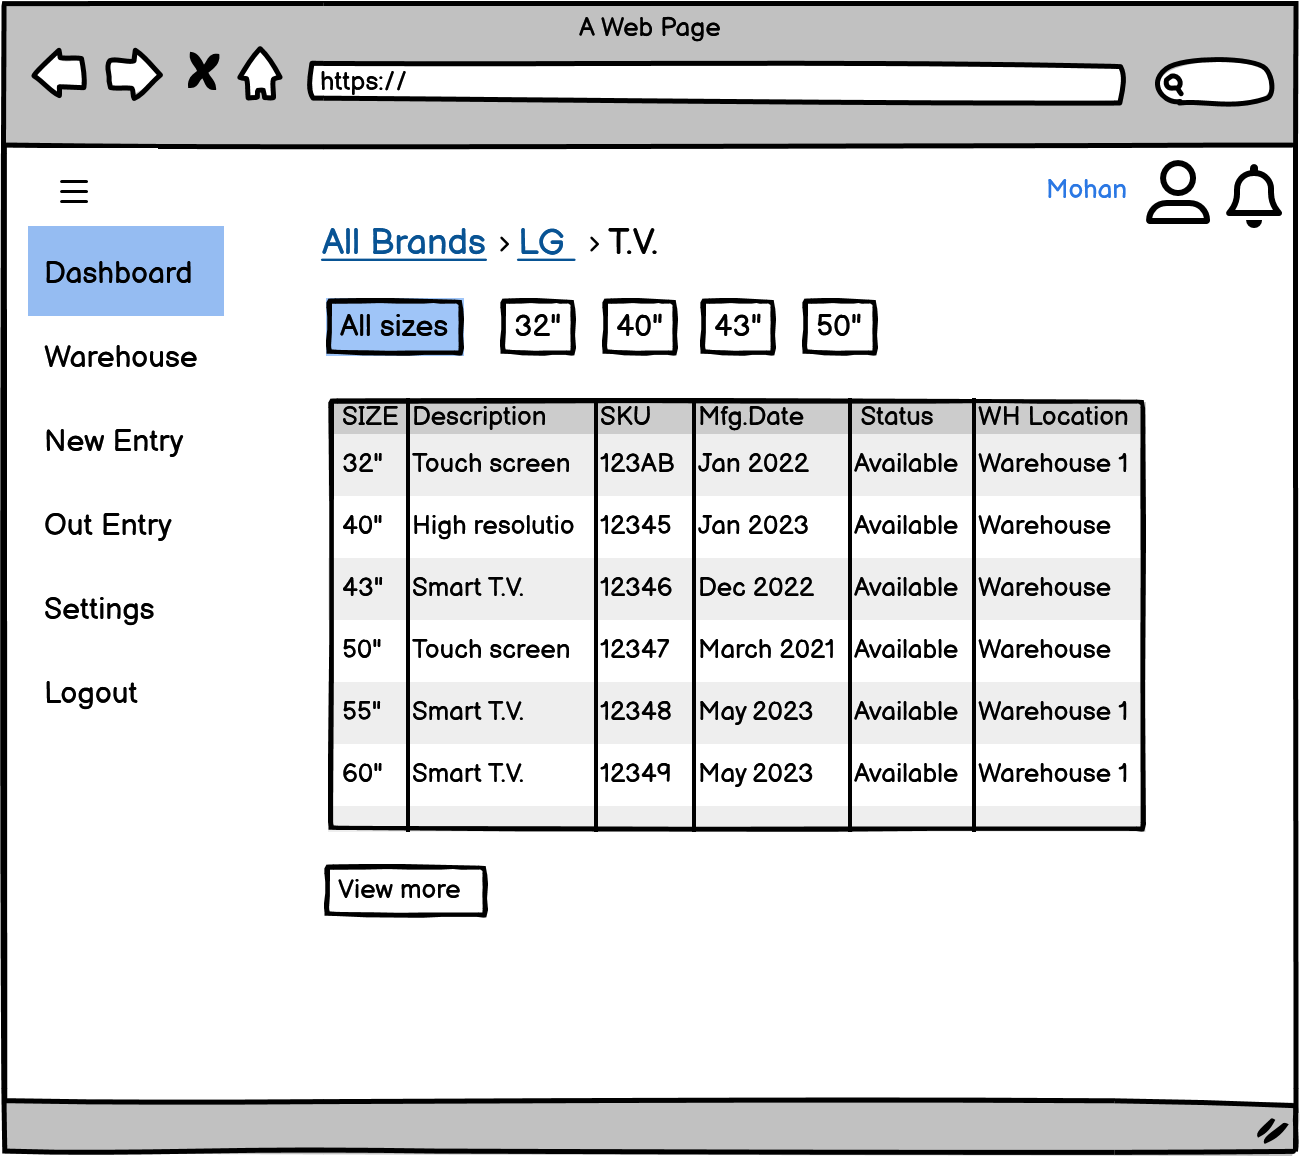
To check the different sizes and descriptions, you can choose all sizes or that particular size under the TV tab in the dashboard.
Warehouse
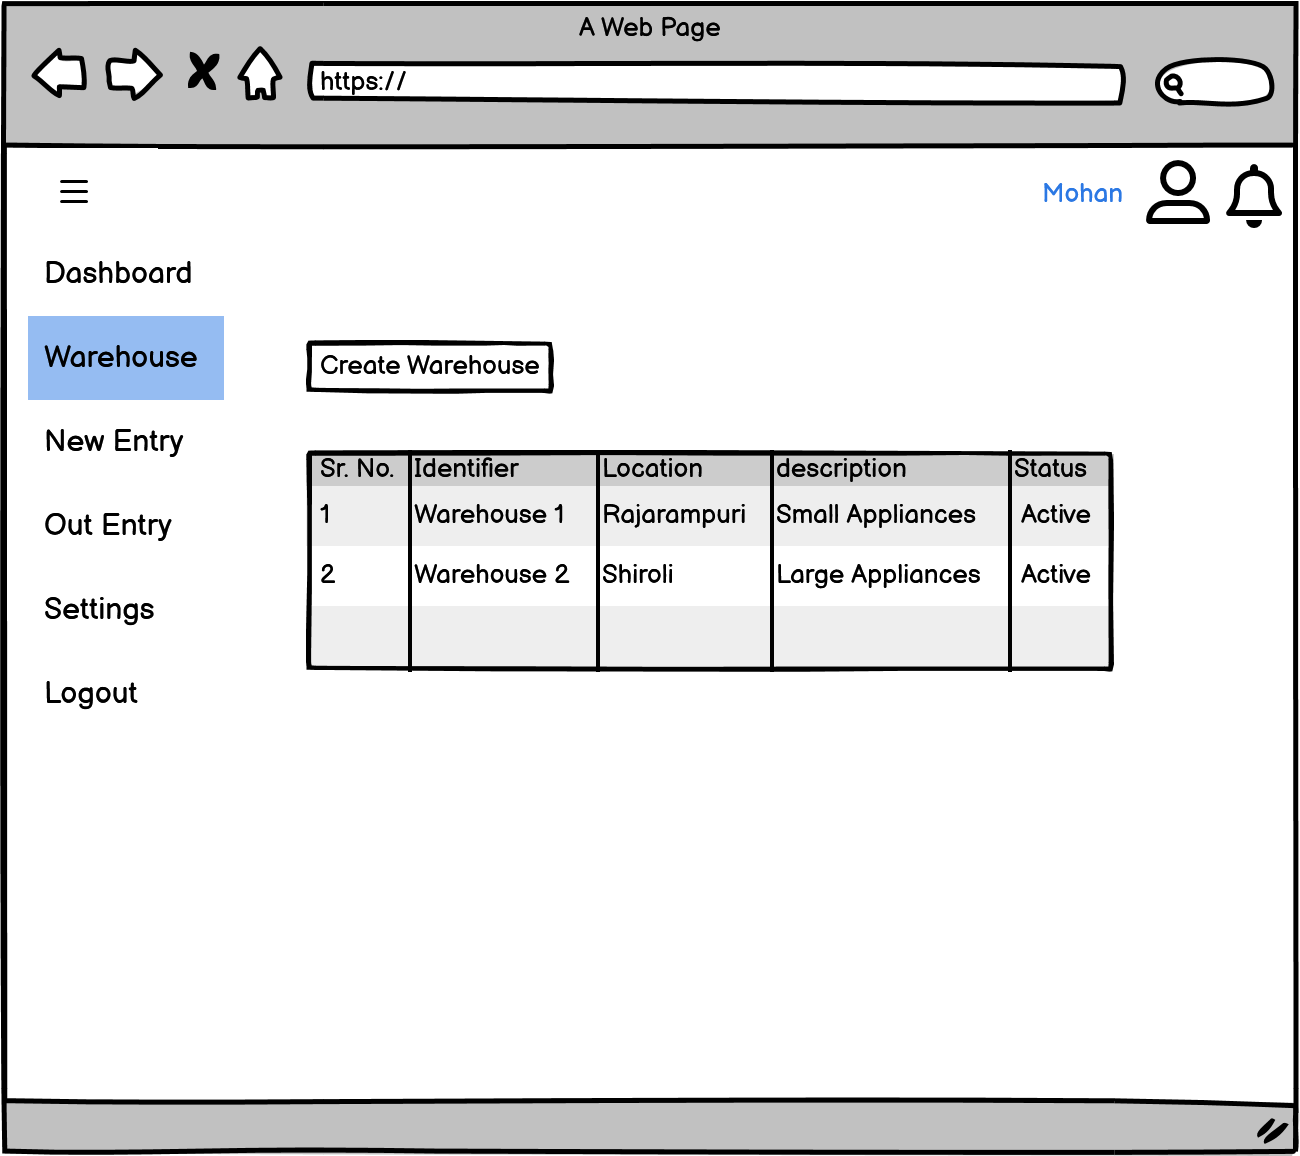
In the warehouse tab, the user can check the warehouses. Here, you can also add a new warehouse.
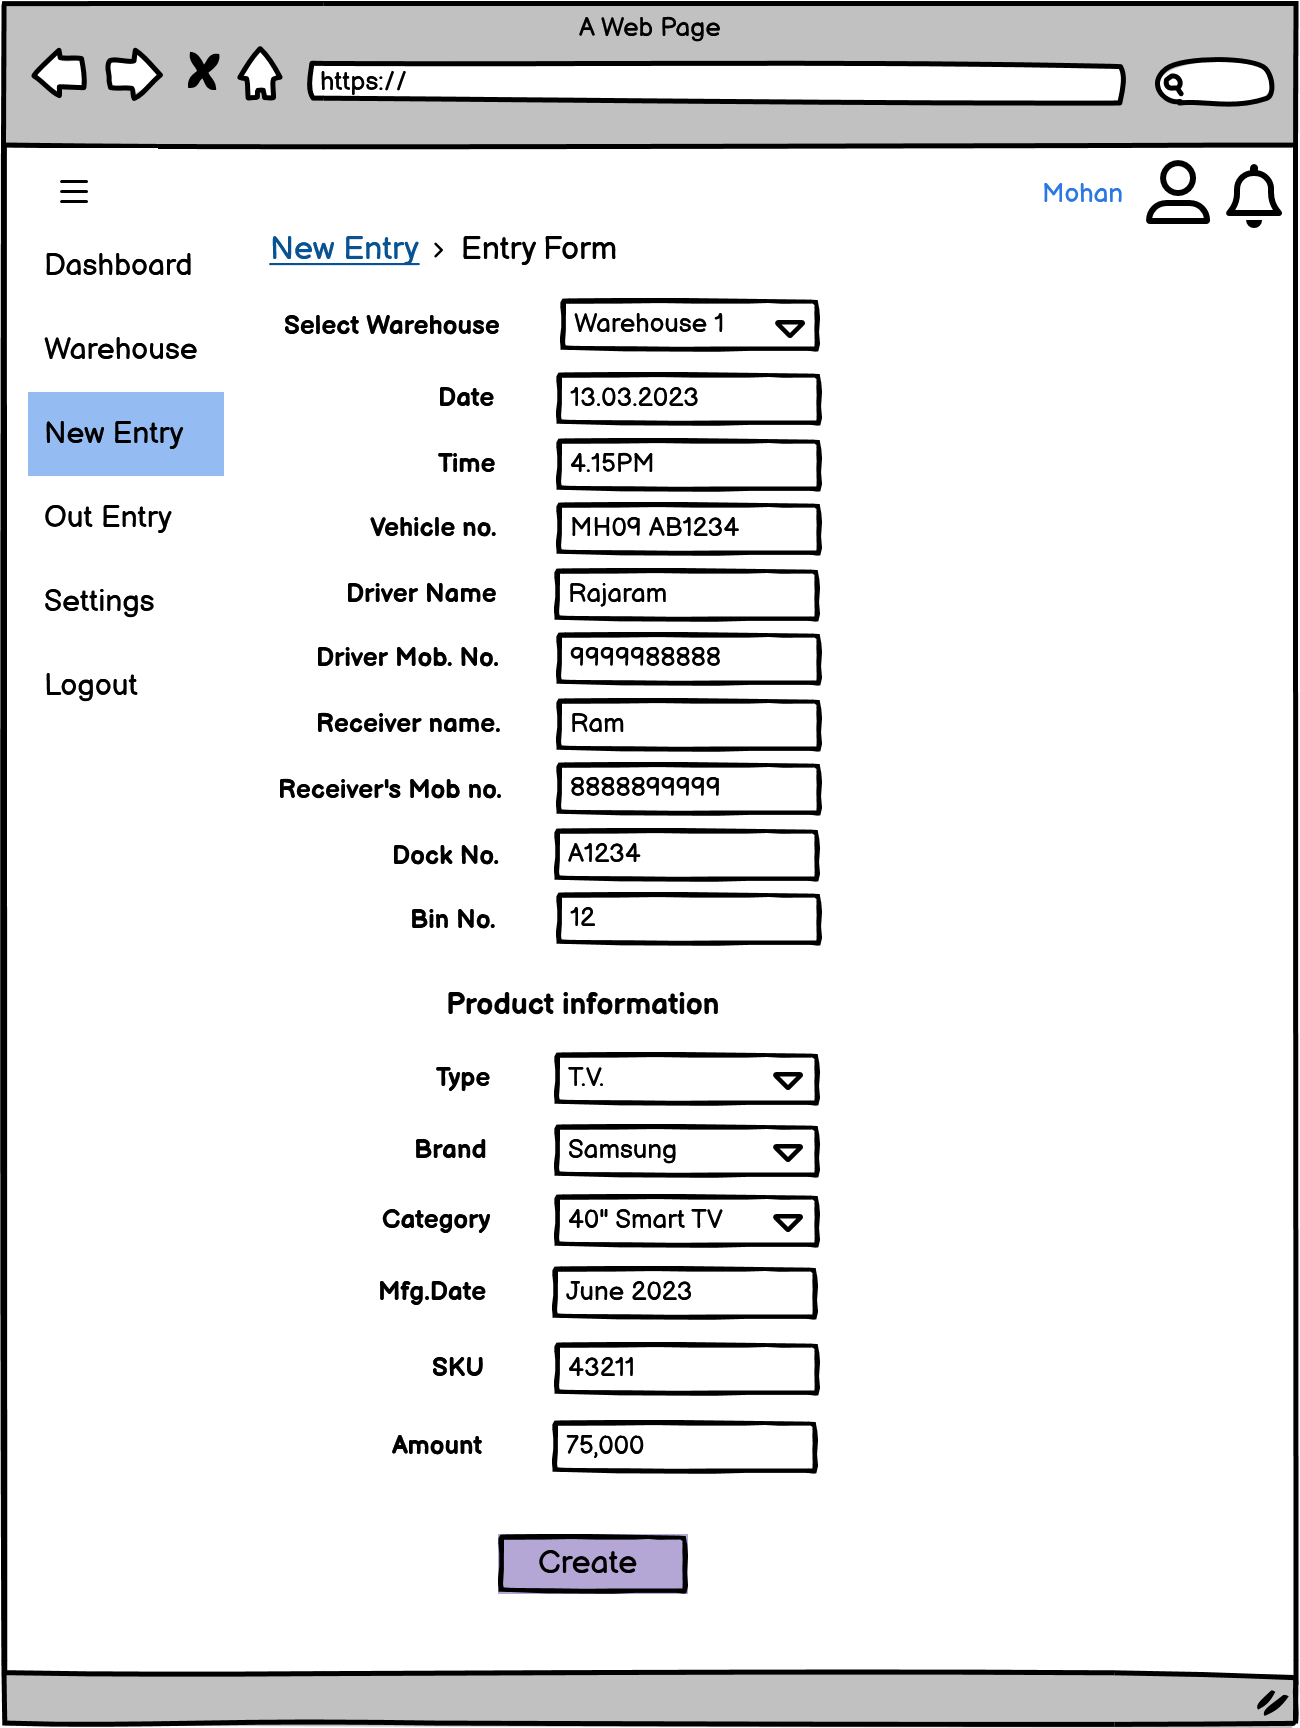
New Entry
To add a new entry first, we need to fill in the given form.
After filling in the details and clicking the create button, a new entry will be added to the database.
Out Entry
To add an out entry, we need to fill in the given form first.
After filling in the details and clicking the confirm button, out entry will be recorded.
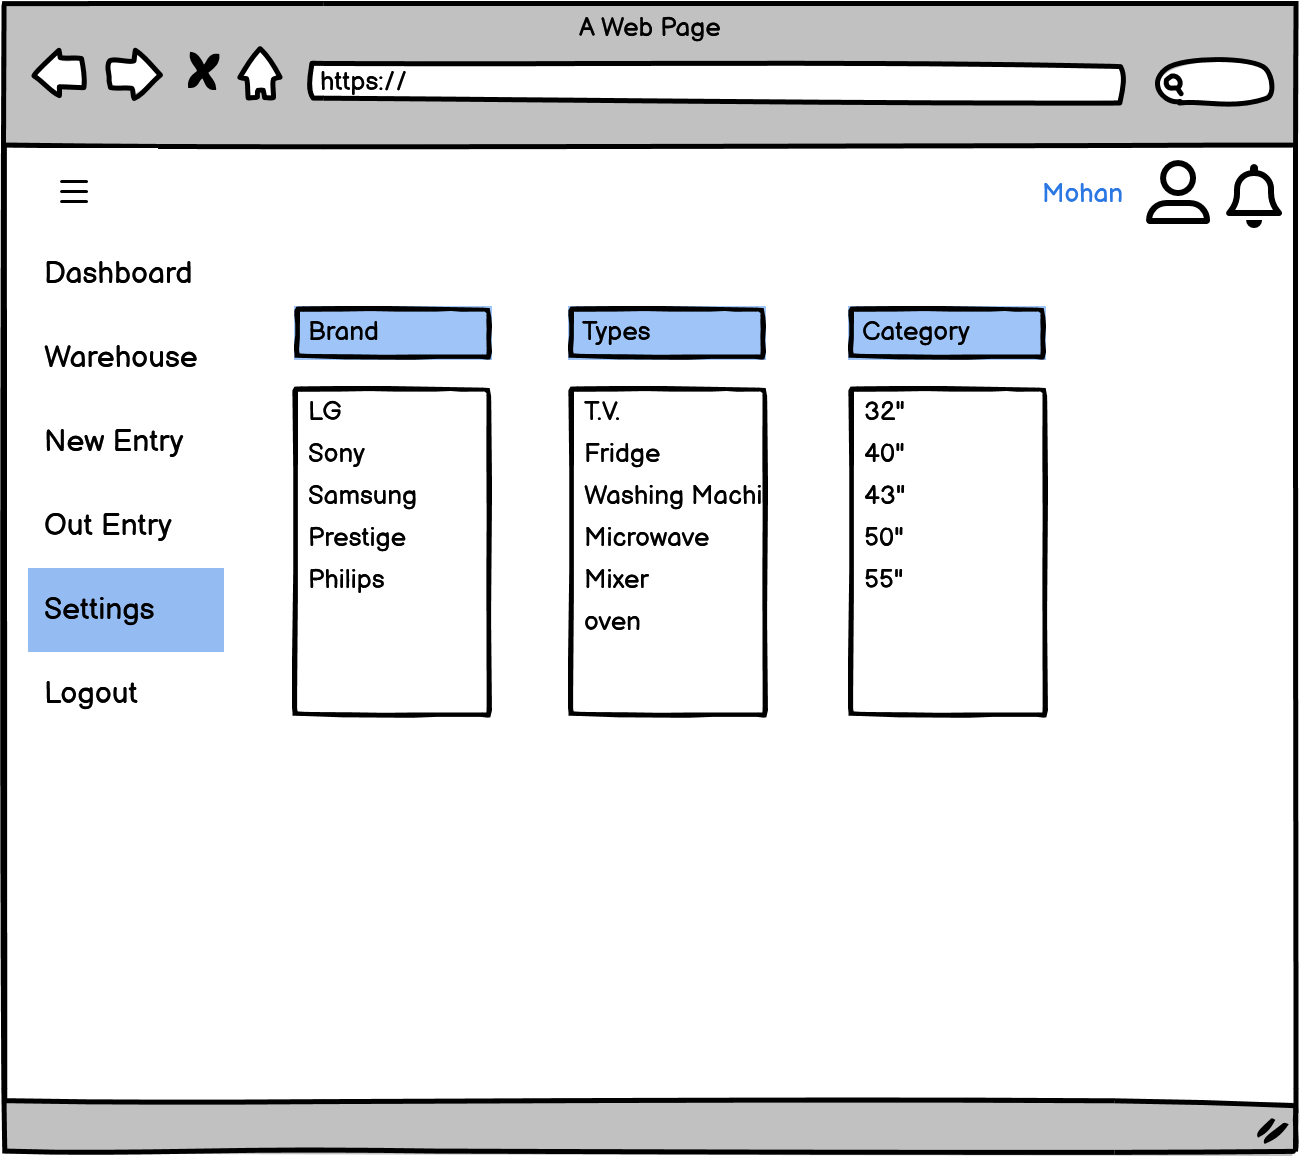
Settings
On the settings page, you will see the list of items by brand, type, and category.
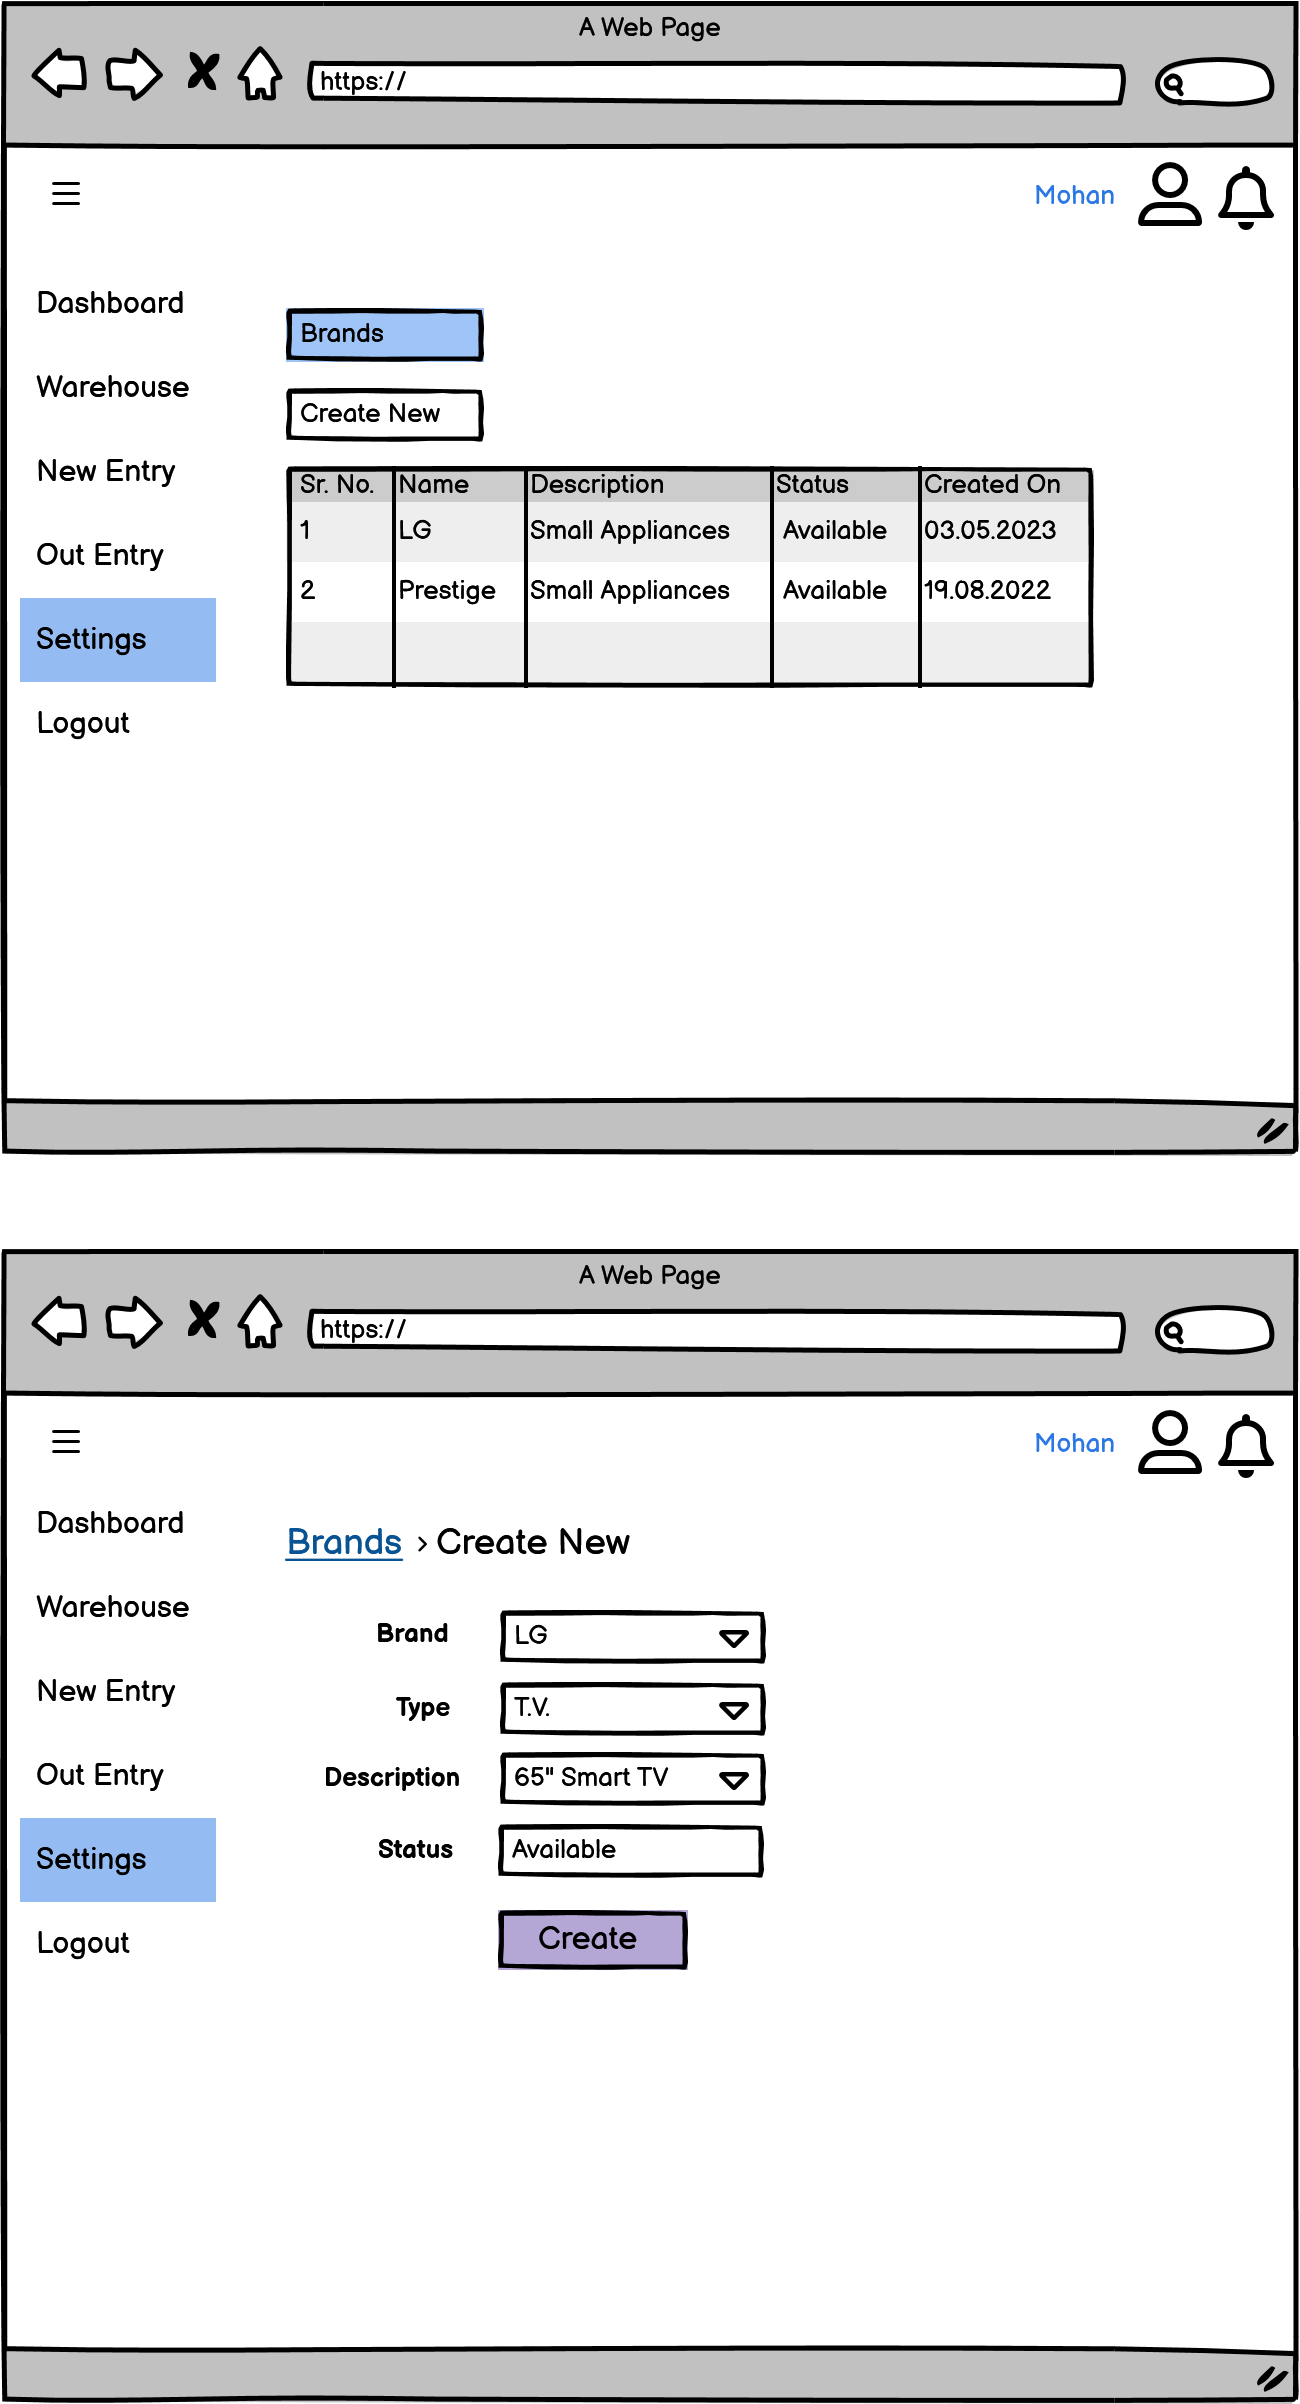
Setting (Brand)
Further, when you click on the brand tab you can view the list of brands with specifications of that product.
Here, you can add a new brand with Create new. When you click on Create New, a new form will open, and after filling up all the details in the form, click create, and a new Brand will form in the system.
Setting (Type)
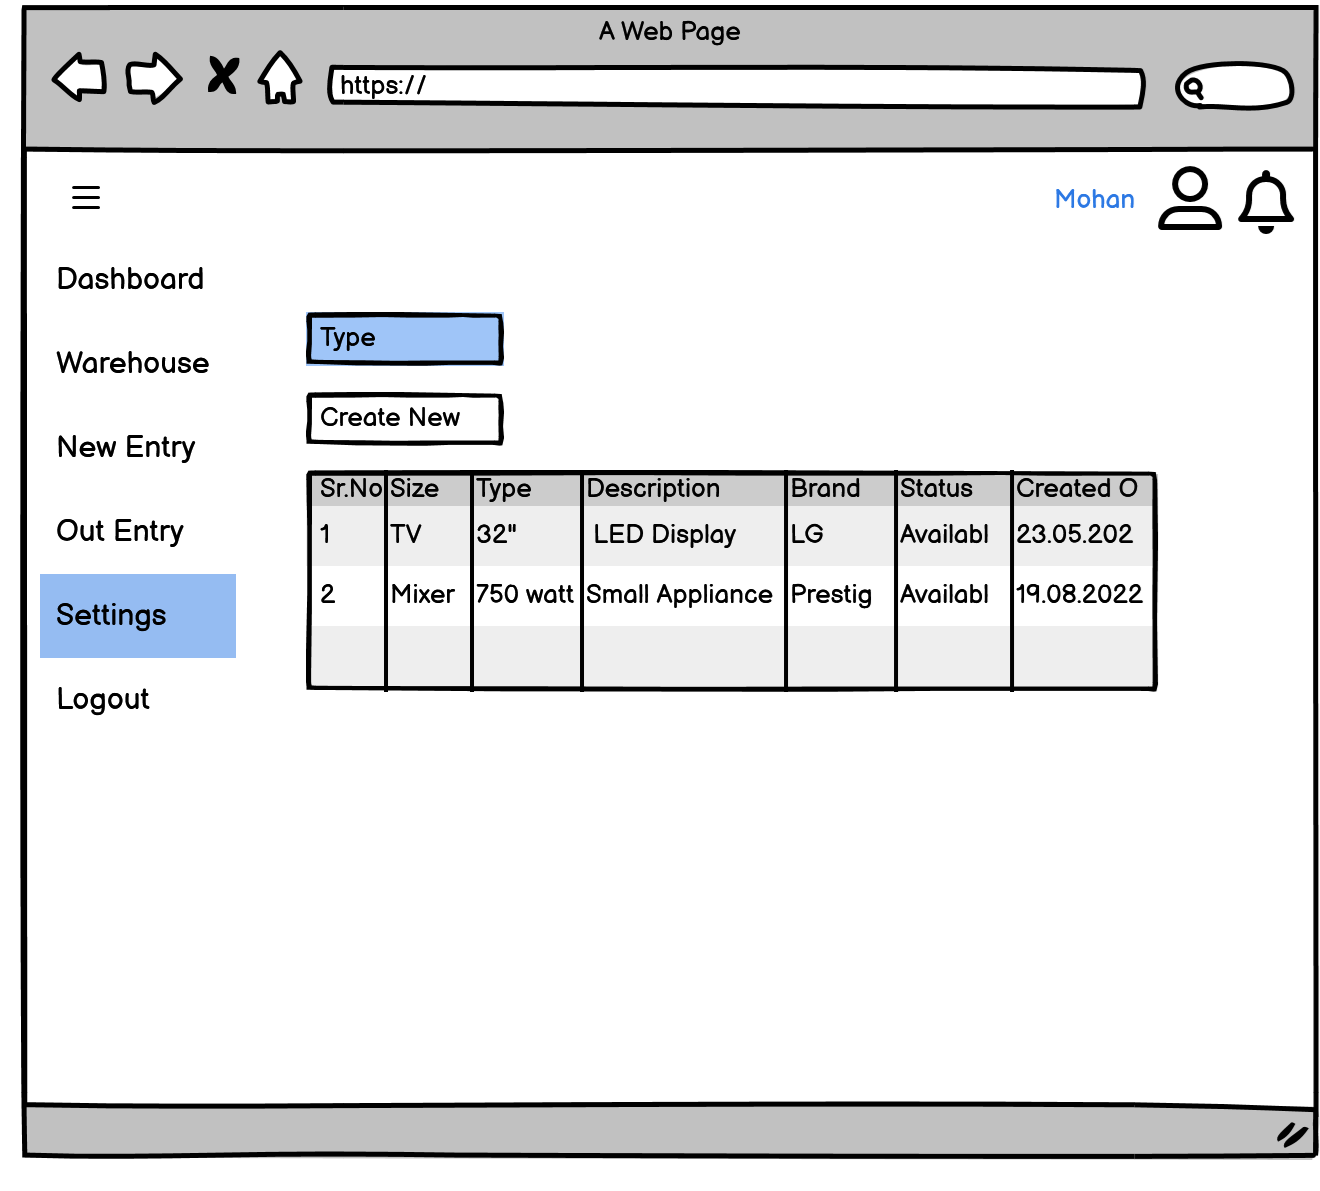
Same as Brand, when you click on the Type tab, you can view the list of products with specifications.
You can add a new type of product with the help of a create new tab. Once you click and fill in the information about a new product and click the Create Tab, a new type will be added to the list.
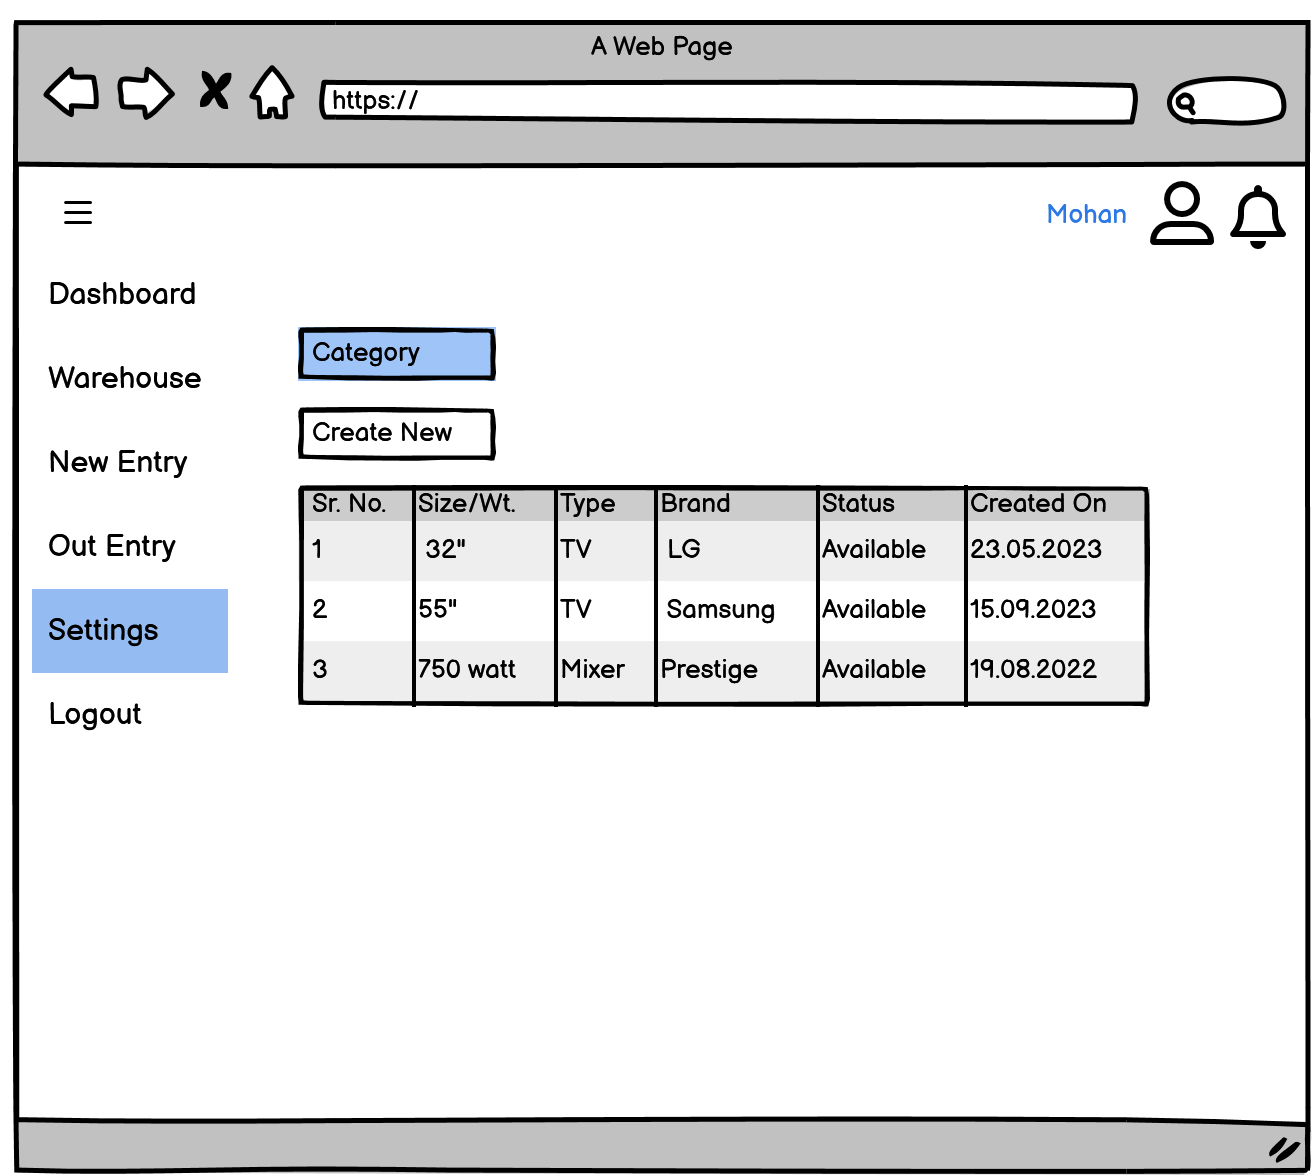
Setting (Category)
Similarly to Brand and Type, when you click on the Category tab, you will see the products list with different sizes and wattage, etc. with specifications.
You can add a new category of product with the help of the Create New tab. Once you click and fill in the information about a new category and click the Create tab, a new type will be added to the list.
